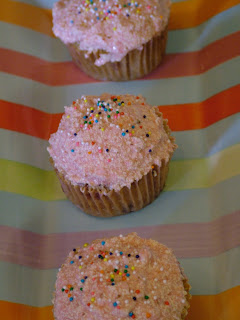
Friday, May 30, 2008

So hungry I forgot to make a side dish!

Yes, it is true. When I got home from work last night I was so hungry I completely forgot to start the potatoes. Actually, I was on the phone with my husband when I walked in the door. Since he is working 2 jobs right now I hardly see him and sometimes talking on the phone is the only talking we do. So, I was a little distracted. But, let's just call this what it is...baby brains coupled with crazy pregnancy appetite!

I saw Paula Deen's recipe for Basil Grilled Chicken on the Food Network website yesterday afternoon and decided that would be dinner. Yes, I start thinking about dinner as soon as lunch is over. This baby must be going through a last minute growth spurt. ;) (Or at least that is what I tell myself) I knew I would just do something simple with potatoes to go with it, but they never crossed my mind again after I got started on the chicken. Usually I begin work on the side dish while the meat is marinating, but this recipe doesn't have a marinade time.

Since I didn't realize I didn't have anything to eat with the chicken until it came off the grill, I decided to eat in shifts. I told you I was starving, so I couldn't possibly wait until I got the potatoes fixed. Plus, the chicken smelled wonderful and I was so excited that I got to use the first basil from my Garden in a Bag project! I couldn't wait to taste it.

This is a great, quick grilled chicken dish. Like I said, no marinating required and it has tons of flavor. I will definitely make it again! I reduced some of the butter since I was using cutlets instead of whole breasts. Plus, we all know how much Paula Deen loves that stuff and it seemed a bit on the heavy side to me. You will notice from the pictures though, it is still a lot of butter!
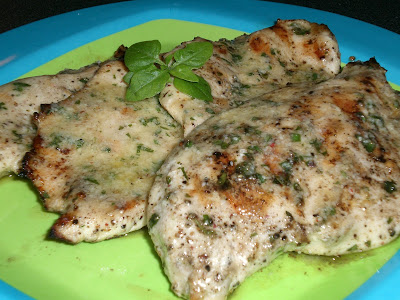

Basil Grilled Chicken
Source: Paula Deen

3/4 tsp coarsely ground black pepper
4 skinned chicken breast halves (I used boneless, skinless chicken cutlets)
1/4 cup freshly chopped basil leaves, plus 2 tbsp freshly minced basil leaves
1/3 cup (5 tbsp) butter, melted plus 1/2 cup (1 stick) butter, at room temp. (I only used 4 tbsp melted and I used 5 tbsp at room temp.)
1 tbsp grated parmesan
1/4 tsp garlic powder
1/8 tsp salt
1/8 tsp pepper
Fresh basil, for garnish


Press the coarsely ground pepper into the meaty side of the chicken breasts (I did both sides since mine were cutlets). Stir chopped basil into the melted butter and brush chicken lightly with this mixture.


In a small bowl combine softened butter, minced basil, parmesan, garlic powder, salt and pepper. Beat at low speed with an electric mixer until smooth. (I just used a spoon to combine everything and it worked out fine). Transfer to a small serving bowl.
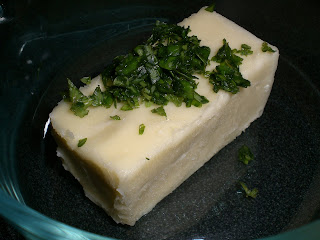

Grill the chicken , basting frequently with the remaining melted butter mixture.

Serve the chicken with the basil-butter mixture and garnish with fresh basil. (I just went ahead and spread the basil butter on the chicken as soon as it came off the grill)

*Also, I had a good bit of the basil butter mixture left over, so when I got around to making my potatoes, I just fried them in a mixture of olive oil and the remaining basil butter. They were great!

Thursday, May 29, 2008

An Ending and A New Beginning

Ok, I have a bit of an attention-whorish beginning to this post, but I am just so excited I can not contain myself any longer! Tomorrow is my last day at work!!! I feel like I've been waiting my whole life to be a stay at home mom and as of tomorrow at 4:30, the new adventure begins. Even though my little boy (hopefully) won't be making his appearance for another few weeks, I'm going to be using my work-free time to get the house in order and try to get some rest before the sleepless nights I'm sure to endure soon.

I'm also hoping I'll have some time to try out some new recipes I haven't been able to get to yet. I know there will be a lull in blogging once my little one arrives, so I plan to get a lot in before that happens. Mostly they are dessert recipes that involve baking, and knowing my track record in that department, I don't need to be trying out any of those as a new sleep-deprived mom.

Speaking of new recipes, I tried out a new pork chop recipe earlier this week. I saw it a while back on Celeste's Sugar & Spice. Honestly they were a bit too much work for a weeknight in my opinion, but of course they tasted great so my husband has requested to have them again. And we will, because they were really good and because did I mention I don't have to go back to work after tomorrow??? He says I should have the time now. ;)

The chops were perfectly crunchy and I loved baking them instead of frying them. Not only is it more healthy, but I just don't like to eat greasy meat. And putting them on a rack inside the rimmed baking sheet keeps the bottom from getting soggy. I also roasted some corn in the husks in the oven while the chops cooked. I then cut it off the cob and tossed the kernels with butter, cilantro, garlic powder, onion powder, salt and cayenne pepper. Yum!


Ultra Crunchy Baked Pork Chops

Source: Sugar & Spice, recipe originally from Cooks Illustrated
(my additions/changes in italics)

4 boneless center-cut pork chops, 6 to 8 ounces each, 3/4 to 1 inch thick, trimmed of excess fat
4 slices hearty white sandwich bread, torn into 1 inch pieces
1 small shallot, minced (about 2 tbsp)
3 medium garlic cloves, minced (about 1 tbsp)
2 tbsp. vegetable oil
Ground black pepper
2 tbsp. grated parmesan cheese
1/2 tsp. minced fresh thyme leaves (I didn't have any, so this got omitted)
2 tbsp. minced fresh parsley leaves
1/4 cup plus 6 tbsp. unbleached all-purpose flour
3 large egg whites
3 tbsp. Dijon mustard
Lemon wedges

Directions:

Adjust oven rack to middle position and heat oven to 350 degrees.


Pulse bread in food processor until coarsely ground, about eight 1-second pulses (you should have 3 1/2 cups crumbs). (I didn't want to dirty up more dishes, so I did this by hand. It wasn't hard at all and made the crumbs more rustic. I really liked it this way)

Transfer crumbs to rimmed baking sheet and add shallot, garlic, oil, 1/4 tsp. salt, and 1/4 tsp. pepper. Toss until crumbs are evenly coated with oil. Bake until deep golden brown and dry, about 15 minutes, stirring twice during baking time. (Do not turn off oven.) Cool to room temperature. Toss crumbs with Parmesan, thyme, and parsley.

Place 1/4 cup flour in pie plate. In second pie plate, whisk egg whites and mustard until combined; add remaining 6 tbsp. flour and whisk until almost smooth, with pea-sized lumps remaining.


Increase oven temperature to 425 degrees. Spray wire rack with nonstick cooking spray and place in rimmed baking sheet. Season chops with pepper. Dredge 1 pork chop in flour, shake off excess. Using tongs, coat with egg mixture; let excess drip off. Coat all sides of chop with bread crumb mixture, pressing gently so that thick layer of crumbs adheres to chop. Transfer breaded chop to wire rack. Repeat with remaining 3 chops.

Bake until instant-read thermometer inserted in center of chops registered 150 degrees, 17 to 25 minutes. Let rest on rack 5 minutes before serving with lemon wedges. (I just squeezed some lemon juice over my chop before eating and it was great!)

Tuesday, May 27, 2008

Zebra Brownies


Whew! Memorial Day weekend was a busy one for me! We pretty much went non-stop, but I did manage to do a bit of baking. ;) Of course, as in all my baking ventures, something wasn't quite right. I did make sure and read the entire recipe before beginning this time, but the problem came in when I thought I had an entire 8 oz. block of cream cheese in the fridge only to discover it was only half a block. For the life of me I can't remember where I used the other 4 oz. So, I had to scale down the cream cheese part of the Zebra Brownies I was making. They still tasted great even if they weren't that pretty.

Let me begin by saying I am VERY picky about my brownies. I don't like the edge pieces because they tend to be crunchy and/or chewy. I like the middle ones best. I want a gooey, fudgy brownie. I would take an undercooked brownie over a hard one. This brownie batter was really thick, but the brownies came out wonderfully gooey and perfect! And if I had enough cream cheese they would have been even better.

Also, next time I will not do the part where it says to drop spoonfuls of batter over the top of the cream cheese mixture. This batter is way too thick for that and swirling just doesn't work out so well. I think it would be better to just put all the batter in the dish, then top with the cream cheese mixture and swirl.


ZEBRA BROWNIES
Source: http://www.recipelink.com/mf/14/22403 (my comments in italics)


FOR THE BROWNIES:
2 cups sugar
1 1/4 cups flour
2 sticks (1 cup) butter, softened
3 eggs
6 tbsp. unsweetened cocoa powder
1 tsp. vanilla


FOR THE FILLING:
1 (8 oz.) pkg. cream cheese, softened
1/4 cup sugar
1/2 tsp. vanilla
1 egg

Preheat oven to 350 degrees F. Grease bottom only of 13x9 inch pan. (I sprayed the entire pan with cooking spray)

Combine all brownie ingredients and mix well (about 1 minute on high speed). Set aside.

In small bowl blend all filling ingredients together at medium speed until smooth, about 1 minute.

Spread 1/2 of brownie batter in prepared pan. Pour filling mixture over batter, spreading to cover. Place spoonfuls of remaining batter on top of filling. Marble by pulling knife through batter in wide curves, then turn pan and repeat. (This is where I would omit the spoonfuls of batter on top)

Bake at 350 degrees F for 30-35 minutes. (30 minutes was perfect for gooey brownies)

Cool. Then refrigerate at least 2 hours before cutting. Cover tightly and store in refrigerator.

Friday, May 23, 2008

Friday Night Dinner

All day I thought about what I wanted for dinner tonight. I knew it would just be me since Taylor had to work late. I also knew it needed to be chicken because we already had some in the fridge defrosted. And can I just say I LOVE chicken cutlets? They are really the perfect size and cook up so quickly. If you can't get cutlets, or the regular breasts are on sale, you can slice them in half to make your own.


Chicken and potatoes seemed an easy choice. It turned out perfectly and really hit the spot. Actually I am sitting here considering going back for seconds, even thought I know I will be stuffed and miserable. It might just be worth it. ;)


Smoky Chipotle Grilled Chicken
Source: Me

4 chicken breast cutlets
2 chipotles in adobo, chopped
2 large cloves garlic, minced
1/2 tbsp sugar
2 tsp cayenne pepper
1/2 tbsp cumin
2 tbsp olive oil
2 tbsp red wine vinegar
1 tbsp lime juice
1 drop liquid smoke
couple pinches sea salt

Combine all ingredients in a large ziploc bag and marinate for 45 minutes. Get the chicken on the grill and put the marinade in a sauce pan over medium high heat. Bring to a boil and let boil about 3 minutes, stirring occasionally. Reduce heat and let simmer until the chicken comes off the grill. This doesn't really make a glaze. It turned out more like a sauce, and wasn't really pretty in the pan, but it tasted (and looked) great on the chicken! When chicken comes off the grill, top with a little of the sauce.


Fried Potatoes
Source: Any good southern girl knows how to make these :)

2 slightly under-baked potatoes (I use the Idaho variety and "bake" them in the microwave. It takes about1-2 minutes per potato depending on the size)
1 shallot, minced (traditionally you would use white or vidalia onion, but I've been in a shallot mood)
2 tbsp olive oil
2 tbsp butter
salt and pepper to taste

Add the oil and butter to a skillet over medium heat. Add the shallot and let cook until translucent.

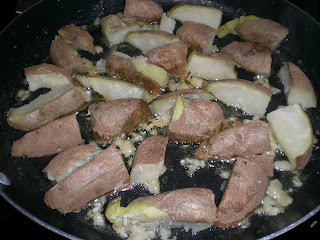
Cut the potatoes in half...


and then cut them into wedges.


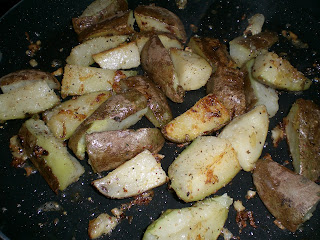
Add them to the pan in a single layer and let them hang out. Don't stir them around, just let them crisp up.


Once they have browned on that side turn them over and let them brown on the other side. Add your salt and pepper to taste.


Ok, yeah, I'm going back for seconds...

Thursday, May 22, 2008

Grilled Pizza???

I've have been seeing this concept on many blogs over the past few weeks and keep meaning to give it a try, but things have been a little hectic lately. For one, I went into pre-term labor this past weekend and had to go to the hospital to get those contractions to stop so this baby will have a little more baking time. Contrary to what my husband believes, my tummy does not function like a turkey; just because my belly button has popped out doesn't mean the baby is done cooking!

I am now getting back into the swing of things and decided I would try out this concept of grilled pizza tonight. As you know, I am a big fan of grilling since it keeps the heat outside where it belongs and not inside my house where I am trying to keep it a decent temperature without breaking the bank. Yes, I am the air conditioning nazi. (Just for the record, I am the same way with the heat in the winter. I do not discriminate against seasons)


I made my stand-by no yeast pizza dough and got all my toppings ready to take out to the grill. For me, it was alfredo and pesto sauce with mozzarella, parmesan, pesto-jack, and smoked gouda. I just ran across the pesto-jack at a local grocery store and just HAD to try it out. It did not dissapoint!


I'm sure you don't have to think real hard to know what Taylor had on his pizza. :)


I am now one of grilled pizza's biggest fans. The crust was crispy on the outside and soft inside, with a slight smokiness from the grill. It is my new favorite way to have pizza. You do have to be pretty organized though.


I made the dough and got the crusts rolled out. I then sprayed the grill with olive oil and got it heating up. I gathered my toppings and headed out to the grill. Throw the pizza dough on the grill for about 5 minutes, until the side on the grill is firm and has nice grill marks.


Flip the pizza and add your toppings. Close the lid and let the pizza grill until the cheese is melted. This all happens really quickly so that is why you want to have your toppings out at the grill with you.

Wednesday, May 21, 2008

Shrimp on a Stick


Today I read a post by Kate over at Paved with Good Intentions where she noted that a friend of hers says anything is better when served on a stick. She made lemon shrimp on bamboo skewers that made my mouth water! I was already thinking about shrimp for tonight, except mine would be BBQ shrimp because I am still trying to use up the rest of the BBQ sauce from the night we had ribs. So I decided to have BBQ shrimp on a stick! Also, shrimp cooks really quickly so it fit right into my plan to get home and eat as soon as possible.
I just marinated the shrimp in the BBQ sauce for about 45 minutes then put it on skewers and threw it on the grill, brushing it with more sauce as it grilled.

I also wanted something easy for the side so I took some help from the store and made Rice A Roni Nature's Way Parmesan and Romano flavor. It was really good! I highly recommend it for a week night when you need to get something on the table quick.


Monday, May 19, 2008

Love Makes the World Go 'Round


The blogging world that is! :) I was given the "I Love You This Much" award from Dela at Not Your Mama's Southern Cooking. She is so sweet and I used to see her every day at lunch (we work together) until she changed jobs and now I never see her. :( How sad!

Now I'm supposed to give this award to 10 other bloggers I love, but love is a strong word to me so I am just choosing the blogs I love to read the most. The blogs I check out regularly, pretty much on a daily basis and I don't have time to read 10 blogs regularly. So here you go:

First and foremost, I give this award to my sister, who has a new blog called Mommy Meals. She just got started so make sure you bookmark it and check back as she adds more recipes (and hopefully some pictures of my nephew because he is seriously the cutest thing EVER!) She is a great mom and a great cook!

I'm also giving this award back to Dela because I love reading her blog too! You probably aren't supposed to give it to people who've already received it, but I think that just shows them that a lot of people love them. And what is wrong with that? Plus, are the blogging police going to come get me for not following the rules???

I also check out Kate's Paved with Good Intentions and Nicole's Art and Aioli regularly. I guess I need to branch out and start reading more blogs. I'll work on that. ;)

Friday, May 16, 2008

Look What I Made!

Nicole at Art & Aioli tagged me with the "Look What I Made" game! I love trying out recipes I find out in the blogging world, so this tag was perfect for me. Thanks Nicole! I am going to tag Dela, Kate and Amber with this game.

HERE ARE THE RULES to LOOK WHAT I MADE!

1. List the names of 2-5 recipes you tried from other blogs. Provide a direct link to the recipe. If not available, give the blog link and let the reader search for the recipe by name.

2. Shortly describe your experience with the recipe.

3. Tag 3-5 other bloggers or the authors of the recipes you listed to post the links to the recipes they have tried from other bloggers. Note: If you are new to the blogging world and haven’t had a chance to try any recipes from your fellow foodies, just pass the tag on to someone else.

4. Notify the tagged bloggers about the tag either by leaving a comment on their blogs or by emailing them.

Here are some recipes from other bloggers I’ve made since the inception of my blog 8 months ago (the links are to the original recipes, but you can search my blog for my versions):


1. Southern Apple Cobbler. The recipe was originally a peach cobbler from Culinary Concoctions by Peabody. I don’t like peaches though, so I made mine apple. It was the perfect cobbler and is now my go-to recipe.


2. Chocolate Chip Cooke Dough Dip. Lots of people have blogged about this recipe, but I got it from Michelle at Sugar & Spice. If you’ve somehow missed making this, you should try it. I’ve made it several times since and it is ALWAYS a hit!!


3. Chicken Bacon Ranch Pasta Salad. This recipe came from Amber’s Delectable Delights. I’ve been meaning to make it again because I really enjoyed it and it was inhaled at the party where it made its debut. I am making myself a note right now.


4. Spicy Thai Shrimp. Thanks goes to Kate at Paved with Good Intentions for this one. I love all things spicy and this recipe did not disappoint!


5. PW’s Perfect Risotto. The Pioneer Woman knows a thing or two about risotto. It truly was perfect and I didn’t even use the right kind of rice. (Read: I’m lazy and didn’t want to go to the store when I had another kind of rice already in my pantry)


Tuesday, May 13, 2008

How Does My Garden Grow?


With the addition of peppers! (They are in the yellow pots on the sides) I have been talking about getting peppers to plant since my herbs are doing pretty well at this point. I love the idea of being able to walk outside and get ingredients rather than having to run to the grocery store. Also the fact that it saves money doesn't hurt my feelings any either. My sister and brother-in-law got me some pepper plants for my first mother's day, serrano peppers and cayenne peppers.

I can't wait until I can add these to some dishes and spice things up! :)

Garlic Cream Chicken and Rice

Ok, finally another food post! I realize this is a food blog and my past two entries were about my anniversary/my life, but hey, it's my blog. I can post anything I want. I can even be a little attention-whorish sometimes. ;)

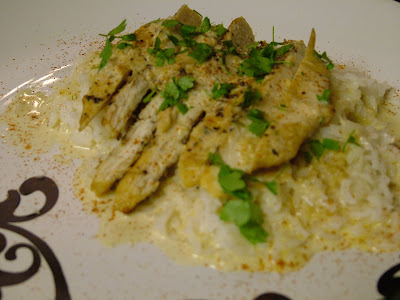
But now, I am back with food. Tonight we had Garlic Cream Chicken. I've had this recipe saved for a while, but for some reason I just haven't made it yet. I changed it a lot, but the biggest change was that the original recipe called for 3 heads of garlic (for 4 chicken breasts) and you were to leave the cloves whole through out the cooking process. Now we love garlic at our house, but have you ever heard the saying, "too much of a good thing?" I decided to cut down on the garlic a lot and to press it so that you wouldn't bite into a chunk while eating your chicken.

I served the chicken over rice to soak up the wonderful garlic sauce. It really is a great recipe!


Garlic Cream Chicken and Rice
Source: Adapted from Elizabeth's Cooking Experiments, which she adapted from www.adamandmonika.com

6 cloves garlic, pressed
4 chicken cutlets (or 2 full size breasts)
salt & freshly ground pepper
1 1/2 tbsp butter
1 1/2tbsp olive oil
1/2 cup chicken stock
1 tbsp flour
1/2 cup heavy cream

1/4 cup fresh grated parmesan cheese
flat leaf parsley, rough chopped, for garnish
cayenne pepper, sprinkled over the top


Season chicken liberally with salt & pepper. Heat the butter and oil n a large deep pan over medium heat. Sauté chicken until nicely browned (~5 min per side). Chicken does not have to be fully cooked at this point. Transfer chicken to a plate and get the rice cooking.

Add garlic to the pan, lower heat to medium, and sauté until soft. Be careful not to burn the garlic. Add stock and bring to a boil. Return chicken to the pot. Cover and simmer for 30 minutes. Remove chicken to a platter and cover with foil.

Add cream and boil for about 3 minutes. Plate rice, sprinkle parmesan cheese over the rice. Add a little sauce then chicken and more sauce. Top with parsley and sprinkle with cayenne pepper.

Monday, May 12, 2008

12 months makes a big difference...

I was looking through my wedding pics and this just happened to make me laugh. I thought I'd share...


Me on my wedding day, 12 months ago:


Me yesterday, a little over 7 months pregnant:


My how things change! LOL! I sure wish I had that tan right about now! I didn't realize how white I am until it was staring me in the face.

Happy Anniversary to me!!


One year ago today I changed my last name and promised to put someone else above myself for the rest of my life. I can not believe it has already been a year! And if you will please do the math, our baby is not due until NEXT month...that's right, we were married a whole 4 months before getting pregnant! ;)

Anyway, we are going out to dinner tonight to celebrate. We aren't doing big gifts since the baby is coming soon and that is pretty much the biggest gift ever!

So, I leave you with some pics of that perfect day 12 months ago...

Saturday, May 10, 2008

Mothers Day...


I'm not technically a mom yet, but give me about 7 weeks and I will be. ;) My husband got me the PBK diaper bag I wanted for my first (almost) mother's day. Yes, I picked out my own gift. I personally see nothing wrong with that! It's a win-win situation for everyone.

For my mom, I wanted to make a dessert she would enjoy. We are all going to my grandmothers to hang out and have pizza so none of the mom's have to cook. I thought something sweet would be nice so I started thinking about some of my mom's favorite things. She loves chocolate turtles. You know, the chocolate, pecan and caramel candies? I found a recipe for a Chocolate Turtle Tart and knew I'd hit the jackpot. It sounds exactly like something she would like. This would also allow me to use my new cast iron pan I purchased several weeks ago if I made it into tartlettes. Of course you can only make 6 with that pan, so I also used a muffin tin.

The tartlettes in the muffin tins turned out better than the cast iron pan. I think it needs to be seasoned more thoroughly because they stuck and didn't come out near as pretty as I wanted.

I also had a hard time with the caramel. It was a lot harder to make than than I thought. Overall they came out ok though. Not as pretty as I'd envisioned, but Taylor ate 3 for dessert after dinner tonight and he said they were excellent! At least they tasted good even if they weren't as pretty as I would have liked.


This is what the cast iron pan produced. If you look closely on the left side you can see where I had to destroy it to get it out of the pan. I tried to camouflage it as best I could. :)


Chocolate Turtle Tart

Source: About.com

Serving Size: 16
Preparation Time: 4:00

For the crust:
3 2/3 cups pecans, halves or whole, to be processed in Cuisinart.
1 1/4 cups sugar
7 tablespoons unsalted butter, melted


For the Filling:
1 pound fine semi-sweet chocolate
2 cups heavy cream

For the Caramel Sauce:
1 stick unsalted butter
1 cup sugar
1 cup heavy cream
3/4 cup crushed pecans (garnish)


Crust: In a food processor blend pecans and sugar together, add melted butter in a steady stream until combined well. Turn out mixture into a 12' tart shell pan with removable bottom. Press into 1/8" thickness on bottom and 3/8" for sides. Bake at 350 for approx. 20-25 min. or till toasted then cool.

Filling: Bring cream to a boil and pour over coarsely chopped chocolate. Mix until chocolate is melted and mixture is combined well. Pour onto cooled crust and refrigerate for 3 hours. May be stored over night.

Sauce: In a heavy sauce pan, heat and melt the butter, add the sugar and cook until medium brown not burnt. Remove from the heat and add the heavy whipping cream, be ready for it to boil up quickly and be ready with a utensil to stir it. Mix thoroughly until mixture turns a rich golden color, it will darkens lightly as it continues to cook with its own retained heat off of the burner. That is the reason you do not bring the butter-sugar mixture to the color you want to end up with but you stop short of that color since it will darken. If you bring the sugar-butter mixture to the color you want to finish with you will end up with a burnt caramel. This can happen, and you may find that you toss out the first attempt and the second try will be perfect. Straining the caramel through a small strainer will create a smoother texture of caramel but is not necessary.

To Serve: Drizzle warm, not hot, sauce over thin slices of tart, garnish optional with chocolate curl or pecan half.

Friday, May 9, 2008

Dinner in a bowl


When I made the sauce for the ribs Wednesday night there was a ton leftover. That was fine because we both really liked it and I had already planned to make grilled chicken tonight, so it became BBQ grilled chicken. Yum! But what to go with it???

I have some fresh corn I stuck in the freezer and of course we always have potatoes, so my mind wandered to a dish I threw together right after Taylor and I got married. I had grilled some chicken and made sautéed potatoes for dinner, but Taylor had to work late. So, I just cubed the grilled chicken and threw it in a Tupperware dish with the potatoes for him to heat up when he got home. He loved it! He ate it right out of the container and said he liked having the chicken and potatoes all mixed together. He has asked for it several times since then. I really do have an easy to please husband.

Tonight I decided to do a similar dish and add some corn to the mix this time. This was super easy and quick and of course fabulous! I think this may be the best meal I've had/made in a long time. All the flavors went perfectly together! I ate so much I am now reclined back sighing and watching my belly jump as Logan enjoys it too. Ha!

Oh, and I got to use the first little sprigs of cilantro from my garden in a bag!! I was so excited!


Jaime’s BBQ Chicken, Potatoes and Corn Bowl

4 chicken cutlets (or 2 chicken breasts pounded thin)
1 cup Southwestern BBQ Sauce, plus more for basting
4 ears fresh corn
1 tbsp paprika
1/2 tbsp cumin
1 tbsp garlic powder
1 tsp cayenne pepper
1 tsp salt
4 tbsp melted butter
4 medium red potatoes
2 tbsp olive oil
2 tbsp onion powder
salt and black pepper, to taste
juice of 1/2 a lime
1/4 cup chopped cilantro


Place the chicken in the BBQ sauce to marinate while you prepare the other items.

Wash the potatoes and prick them several times all over with a fork. Microwave for about 5 minutes or until tender. Let cool. When they are cool enough to handle, dice them. Heat a skillet over medium high heat and add the olive oil. When the oil just starts to smoke it means it is ready for you to add the potatoes. Sprinkle with 1 tbsp of the onion powder and let them sit and get crispy. When you see the edges browning up, toss them around, but be sure you get them back in one layer. Now add the other tbsp of onion powder. Once they are all crispy and brown, remove from the heat and let them hang out until you are ready for them.

Shuck the corn and add the paprika, cumin, garlic powder, cayenne pepper and salt to the melted butter.

Preheat your grill and add the chicken and the corn. I like to put a little olive oil on my grill before I preheat it so the chicken doesn’t stick. Baste the chicken with the BBQ sauce and the corn with the butter each time you turn it.

Once the chicken and corn are all grilled and yummy looking, take them inside. Cut the corn off the cob into a serving bowl. Add the potatoes and toss. Cube the chicken and add to the mix and squeeze the lime juice over it all Top with cilantro.

Wednesday, May 7, 2008

9.5 out of 10!

Brace yourself, coming at you is another Emeril recipe. I don’t know why when I am searching through hundreds of recipes his always stick out for me. Maybe it is because a lot of his food is spicy and garlicky…my two favorite things! (I’m not even sure if garlicky is a word, but you get my point)

Tonight we had BBQ pork spare ribs, Emeril style. I’ve only made ribs one other time in my life and they were good, but I underestimated how much cooking time they would require. Tonight I went in with my eyes wide open. I knew I would not be eating until after 8:00 p.m. Don't worry, I had a snack. ;)

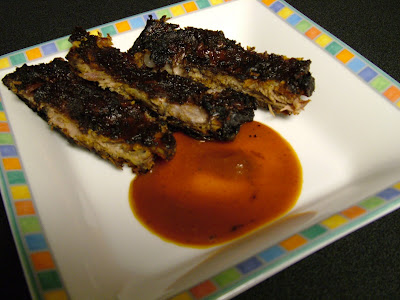
This was a true test of my BBQ skills. Ribs are Taylor’s favorite meal…ever. He is also a traditionalist, so I was worried he would think the ribs were not up to his standard since I am not known for going the traditional route; hence the Emeril recipe. He was pleasantly surprised. He gave these ribs and sauce a 9.5 out of 10!!! My cooking has never been so flattered. He even said the ribs were great even without the sauce but the sauce was the perfect complement. The sauce is spicy though! It starts out sweet and then gives you a good kick at the end.

The only thing I would do differently is not put the sauce on the ribs while they are on the grill or at least just put a very thin layer. The sugar in the sauce caused it to make a pretty thick crust that just made for messy ribs. If you don't mind messy ribs, go ahead and cake on that sauce!


Pork Spare Ribs with Southwestern Barbecue Sauce

Source: Emeril

2 slabs pork spare ribs, about 3 pounds each - I only used one as you can see
2 tablespoons liquid crab boil
2 teaspoons, plus 1 tablespoon salt
3 bay leaves
2 tablespoons dark brown sugar
2 tablespoons paprika
1 tablespoon chili powder
1 tablespoon ground black pepper
1 teaspoon cayenne
Southwestern Barbecue Sauce, recipe follows

Place the ribs in a large Dutch oven or stockpot. Cover with water and add the crab boil, 2 teaspoons of the salt, and the bay leaves. Bring to a boil. Reduce the heat and simmer for 15 minutes. Remove from the heat and drain.

In a bowl, combine the sugar, paprika, chili powder, black pepper, remaining tablespoon of salt, and cayenne. Pat the ribs dry and rub well with the spice mixture.

Lightly oil the grill rack on a barbecue grill, and preheat to medium-low (about 250 to 275 degrees F). Arrange the ribs on the rack and cover (with foil or upside down hotel pan). Cook, turning every 20 minutes, until tender, about 2 hours, replenishing charcoal as needed. During the last 20 minutes of cooking time, baste the ribs with the sauce, turning twice. Remove the ribs from the grill and serve the ribs with remaining sauce and fried pork rinds.

If you want to make this dish in the oven: After rubbing ribs with spice mixture, place them in a preheated 350 degree F oven for 10 minutes. Remove. Slather ribs with BBQ sauce, wrap in heavy-duty plastic wrap, then wrap in foil, and return to the oven to bake for 1 1/2 hours.

Southwestern Barbecue Sauce:
2 tablespoons olive oil
1 cup chopped yellow onions
1 tablespoon minced garlic
3 tablespoons chopped chipotle chiles in adobo, with adobo sauce
1/2 cup red wine vinegar
2 tablespoons fresh lime juice
4 cups tomato sauce
1/2 cup molasses
2 teaspoons dry mustard
2 bay leaves
1/2 teaspoon salt

In a medium saucepan, heat the oil over medium-high heat. Add the onions and cook until the onions are lightly caramelized, 4 to 5 minutes. Add the garlic and chiles, and cook for 1 minute. Deglaze the pan with the vinegar and lime juice and cook until the liquid is reduced by half, 1 to 2 minutes. Add the adobo sauce, tomato sauce, molasses, mustard, bay leaves and salt. Bring to a simmer and cook until thick, stirring occasionally, 15 to 20 minutes. Remove from the heat and strain.
Yield: 4 cups

Tuesday, May 6, 2008

A First Time for Everything

Tonight I prepared lamb for the first time. I've eaten it on several occasions and really enjoyed it, but to be honest it has always scared me a little when it comes to making it at home. I was never really sure what to do with it, plus it is usually pretty expensive. Well, one of my local grocery stores happened to put shoulder blade lamb chops on sale last weekend, so I went on a search for a recipe. I knew I wanted to grill the chops since it's summer and lets just be honest, I really love the grill.

I never found a recipe that struck my fancy, so I decided to just wing it. I ended up making my own Asian marinade and letting it soak all day while I was at work. I LOVED the marinade. It turned out perfectly. I also reduced it to make a glaze for the chops after they came in off the grill.

The only complaint I have is that I think I would have preferred the smaller chops you usually think of when you think lamb chops. These had a fair amount of fat on them and were marbled through out. I am repulsed by fat so it takes quite a while for me to cut the meat off the bone and inspect it for residual fat on the edges. That being said, the meat was fantastic and if they go on sale again it's fair to say I'll be purchasing them. Taylor has only had lamb one other time and he didn't really remember what it tasted like. I think he enjoyed it since I caught him gnawing on the bone when he thought I wasn't looking. Yes, people actually do that in the south. I, however, am not one of those people!

We had roasted potatoes tossed with toasted sesame oil and McCormick's Mediterranean Sea Salt Blend as our side. They went great with the lamb and are super easy. Wash and slice the potatoes, toss with oil and spices and stick in a 450 degree oven for about 20 minutes.


Asian Style Lamb Chops
Source: Me

4 shoulder blade lamb chops
1 cup soy sauce
1 tbsp minced ginger
2 tbsp toasted sesame oil
2 tbsp red pepper flakes
2-3 cloves minced garlic
1 tbsp sugar
salt and pepper, to taste

Combine all marinade ingredients in a freezer bag and add the chops. Marinade all day (mine were in the marinade about 10 hours) or a minimum of 2 hours. The longer they soak the more flavor they will absorb. Grill chops about 4-5 minutes (per side) on high heat depending on the thickness of your chops.

Put the marinade in a sauce pan and bring to a boil. Reduce heat to simmer until it thickens and makes a syrupy sauce (the glaze). When the chops come off the grill baste with glaze.

When in Rome...


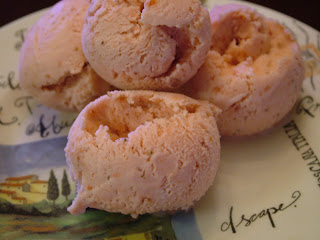
Ok, so we aren't really in Rome but since we had an Italian type meal last night with the fantastico shrimp pasta, I decided to make strawberry gelato for dessert. Taylor and I first had gelato on our honeymoon in Disney World. Our first dinner there was at a restaurant named Spoodles at the Boardwalk Resort. I have to say that it was the best meal we had the entire time! Our dessert that night was a first for us both, hazelnut gelato. It was SO good and creamy; more creamy and less icy than American ice cream. We both fell in love with gelato that night, and while we were in Italy at Epcot we had gelato again! You can find it in the grocery store, but only in about 3 flavors and it is ridiculously expensive.

I decided to make strawberry gelato mostly because there was a pound of strawberries in my fridge that were about to go bad. I really needed to use them up and I happened to find a recipe that called for exactly one pound of strawberries. I think it was fate! ;)

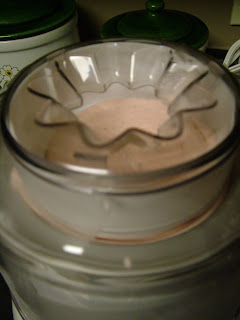
Let me just tell you, this gelato was extremely easy to make. I mixed the ingredients when I got home, stuck them in the fridge while I cooked dinner, and when dinner was done I poured it into my wonderful Cuisinart ice cream maker (this was my first time to use it and it is now one of my favorite kitchen gadgets. It was a wedding gift!). About 30 minutes later, we had gelato!


Strawberry Gelato
Click here for the original recipe


1 lb. fresh strawberries
12 oz. granulated sugar, about 1.5 cups
1.5 cup cold whipping cream
1.5 cup cold water
Dash of lemon juice (only if fruit isn’t “bright” enough)


Clean and cut washed berries into quarters, or just smaller pieces. Put berries, sugar and water into a blender or food processor and blend until liquid and smooth. (This is also where you’ll add lemon juice if necessary.) Whip the cream until slightly thickened - like the consistency of buttermilk. Combine the cream with the strawberry mixture and mix thoroughly until blended.

Freeze as indicated by the manufacturer of your ice cream maker.


Monday, May 5, 2008

Hola!

Well it is Cinco de Mayo and I have no Mexican dish to present you. Sorry, but Mexican food just didn’t make the list this week. I did make that spicy black bean dip Saturday. Go have a look at that recipe if you feel cheated.


However, tonight we did have an awesome meal even if does fall more on the Italian side of the culinary spectrum. It comes from the Pioneer Woman and if you’ve never read her blog go there now. Stop reading and click the link. She is hilarious and her recipes are amazing. I’ve yet to try one I didn’t like.


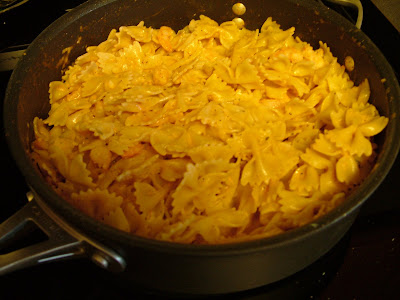
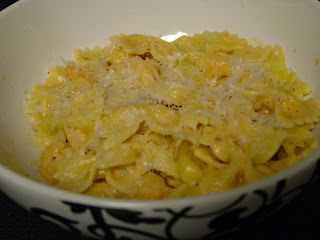
What first drew me to this recipe was the picture on the left hand side of her page. She features different recipes there and if they strike my fancy, I usually check them out. This one happens to be for a shrimp pasta with a tomato cream sauce. I am beginning to love tomato cream sauces. They work great for my family because Taylor would rather have a tomato based sauce and I would rather have a cream based sauce. Now we have the best of both worlds!


Shrimp Farfalle in a Tomato Cream Sauce

Adapted from The Pioneer Woman’s Penne a la Betsy


3 tbsp butter
3 tbsp olive oil
1 lb. Shrimp, peeled and de-veined
3/4 lb. Farfalle pasta (otherwise known as bow tie pasta)
1 shallot, minced
2 cloves garlic, minced
1/2 cup chicken stock
8 oz. Tomato sauce
1 cup whipping cream
1 tbsp parsley
1 tbsp basil
Salt and black pepper, to taste


Put a pot of water on the stove to boil (for the pasta). Heat 1 tbsp of butter and 1 tbsp olive oil in a skillet. Add shrimp and cook until opaque. Remove to a plate. Add the pasta to the now boiling water. Add 2 tbsp butter and 2 tbsp olive oil to the skillet from earlier and add the shallot and garlic, stirring occasionally. Chop shrimp into bite size pieces (remember to remove the tails if yours still have them on). Add chicken stock, tomato sauce and cream to the pan with the onions and garlic, one at a time and stir to combine before adding the next liquid. Add shrimp to tomato cream sauce and salt and black pepper to taste. Add herbs and stir together. Drain pasta and add to sauce. Serve hot with fresh grated parmesan cheese on top!

Bragging Rights

I usually use this term when talking about football. More specifically SEC football. And even more specifically Auburn vs. Alabama football. WAR EAGLE baby! Anyway, this post is not about tossing around the pigskin and who gets bragging rights for the year. It is about me bragging about my sister. My baby shower was this weekend and she did an amazing job of coordinating it. She made several of the hors devours and she made the cake. It was her first time, as far as I know, to make a cake for an event like this and I think she did a WONDERFUL job! You all know my experience with baking so there is no way I could have pulled this off. Plus she has my 20 month old nephew to chase around and another little boy she keeps during the week. Anyway, this is simply a post to brag on her and show off her cake. I forgot to use the flash on my camera so the picture is a little fuzzy. Sorry, I had a lot going on that day. ;)


Spicy Black Bean Dip


If you are in a need of a quick dip to take to a party, or serve at your own party, this one is a hit! I used a chipotle pepper in adobo instead of a jalapeno since I had some readily available. The chipotle isn't as hot and I thought that might appeal to more people. It still had a kick and the chipotle added a nice smoky flavor. I think next time I will do it in a smaller dish because the corn layer kind of got lost in all those beans so the presentation wasn't as pretty as it could have been. It was really good though! I also put mine in the oven to melt the cheese.

Spicy Black Bean Dip
Source: Amber's Delectable Delights -my additions/changes in italics

1 can whole kernel corn, drained
4 cloves minced garlic, separated
1 can black beans, drained and rinsed
4 oz cream cheese
1 small jalapeno pepper, seeds removed - I used a chipotle in adobo
1 tsp cumin
1/2 tsp chili powder
S&P to taste
Cheese for topping - I used a pre-packaged mexican blend

1) Saute' corn and 2 cloves of garlic until the corn is slightly browned. Set aside to cool
2) Add 2 cloves garlic, beans, cream cheese, jalapeno and the seasonings into a food processor and process until smooth.
3) Place 1/2 of bean mixture into bottom of serving dish, then 1/2 the corn; repeat with remaining beans and corn. Top with cheese, if desired. Serve with tortilla chips.

Sunday, May 4, 2008

Graduation Day!

Are you humming pomp and circumstance in your head yet? I think I hummed that song the entire last semester of college because I was so excited to finally be done with school. And now every time I hear the word "graduation" that song just starts playing in my head. Today what began as tiny seeds pressed into a little bag of dirt found themselves transported into the big outside world. Yes, my little seedlings from Garden in a Bag get to spread their roots in large, colorful pots on my back deck. I was so proud! Mostly because I managed to keep them alive this long. Now the true test begins. Hopefully they will flourish in the outside world.

Friday, May 2, 2008

Another baking disaster...

I broke my cardinal rule for baking. Do not do it on a weeknight, especially when you are also cooking dinner. But did I listen to that little voice in my head that said I was over doing it? Nope, I barreled through the caution barrier and tumbled down the cliff on the other side. Some rules are NOT meant to be broken.


It actually started out ok. I got dinner cooked and under aluminum foil tents waiting on Taylor to get home from work. I pre-heated the oven and got to work on the batter for these scrumptious looking strawberry cupcakes from Annie's Eats. My trusty kitchen aid stand mixer didn't let me down and the batter came together beautifully. Then disaster #1 struck. I did not pay close enough attention to the directions and I "might" have overfilled the cups. Nevertheless, I stick those babies in the oven just in time for Taylor to walk in the door and we sit down to dinner.


The timer goes off and I take my first peek at what now appears to be the tops of all my cupcakes fused together since I "might" have overfilled the cups. They have of course bubbled over the top of the liners like mini volcanos. To make matters worse, the tops are already brown and crunchy (because they've run out of the liners) but the centers aren't done. Yes, I am sighing loudly now. I leave them in a few more minutes and set out my cream cheese and butter for the icing so that it can get to room temperature.


Disaster #2 begins when I start to make the icing. Did you know you really shouldn't freeze cream cheese? Yeah, well I didn't. The texture is no longer nice and creamy. It is now lumpy and no amount of mixing makes it smooth and creamy again. But I press on toward my goal of yummy strawberry cream cheese icing because now I am going to have to trim off the edges of my volcano cupcakes and pretty icing could me my saving grace. Nope. Not tonight. I find I have JUST enough powdered sugar and the icing is coming together, but then I again do not pay close enough attention to the recipe. (Side note: This is why I hate baking! You have to pay too much attention!!!) I dump all the pureed strawberries into the icing, but the recipe says just to add it until you get the desired consistency. So now my icing is runny and I don't have any more powdered sugar to add to it. GREAT!


I look around my kitchen at the huge mess I have made with nothing show for it other than sad looking cupcakes and runny icing. At this point I am done. I decide to stick the icing in the fridge praying it will firm up enough to ice the cupcakes before my girl's night Thursday night.


Well, as luck would have it girl's night got cancelled and I had a little more time to think about what to do. I decided to try and ice a few cupcakes to see what would happen. Yeah, the icing was still too runny to sit for any length of time. Here is my attempt to "fix" the cupcakes:


They tasted really good, but basically fell apart when you tried to eat them. So, on to plan B. What do you do with leftover cake? Make a trifle of course! I got out my smaller trifle bowl and tore the cupcakes into small pieces and then layered with the icing. Since I added all of the strawberry puree to the icing, it wasn't overly sweet and had a nice tartness to go with the cake. This was far from the perfect result I had in mind when I envisioned making strawberry cupcakes, but it turned out ok and tasting pretty darn good if I do say so myself.


If you'd like to try these cupcakes for yourself, and by all means PLEASE follow all the directions, I've listed the recipe below. Good luck!!

Strawberry Cupcakes

Source: Annie’s Eats

Yield: about 18 cupcakes

For the cupcakes:

2 ½ cups cake flour
1 tsp. baking soda
¼ tsp. salt
½ cup unsalted butter
1 ½ cups sugar
2 eggs
1/3 cup buttermilk
¼ cup oil
1 tsp. vanilla extract
2 cups chopped strawberries


For the frosting:

½ c. strawberries
8 oz. cream cheese, at room temperature
1 ½ sticks unsalted butter, at room temperature
1 ¾ cups powdered sugar, sifted
½ tsp. lemon juice
1 tbsp. vanilla


Preheat the oven to 350°. Line cupcake pans with paper liners.

Sift flour, salt and baking soda into a medium bowl. Set aside. In the bowl of an electric mixer, cream butter and sugar until light and fluffy. Add eggs one at a time until combined. Add buttermilk, oil and vanilla and beat until combined. Add flour mixture and stir until just combined. Fold in chopped strawberries. Fill cupcake wells ¾ full with batter. Bake for 20 minutes or until a toothpick inserted in the center comes out clean. Cool completely on a wire rack.

For the frosting, puree strawberries in food processor. Strain through a mesh sieve to remove seeds, and set aside. Beat the cream cheese and butter in the bowl of an electric mixer until smooth and fluffy, about 5 minutes. Add powdered sugar and mix until smooth. Add lemon juice, vanilla and strawberry puree. Adjust the amount of puree to achieve your desired consistency. Frost cupcakes when completely cool.