Monday, December 22, 2008

Leftover Do-over


I never know what to do with leftover roast beef. It is really all I can do to eat it the first time, but my husband really likes it. And he will eat some of the leftovers in sandwiches, but really, how many sandwiches can one man eat? Plus, I get tired of staring at it in my fridge.

I decided to have a do-over and make it into something I would really like. I love asian style food: chinese, japanese, thai, ect. So I present to you my leftover do-over: Asian Beef and Noodles

Asian Beef and Noodles

1-2 cup cold cooked beef, sliced thin
1 pack spaghetti noodles, cooked
1/2 cup onion, minced
1 clove garlic, grated or minced
2 tbsp olive oil
1 tsp cornstarch
1 tbsp water
1 tbsp. rice wine vinegar
2 tbsp. soy sauce
1/2 tbsp honey
1 serrano pepper, minced
1/2 tbsp fresh ginger, grated
1/2 tbsp toasted sesame oil
cilantro

Heat heavy frying pan. Add olive oil, meat and onions. Heat until hot and brown. Add garlic and cook until tender. Mix water and cornstarch; add. Add remaining ingredients except cilantro and cook slowly for 10-15 minutes. Top with cilantro.

Saturday, December 20, 2008

Another Not So Salad, Salad Post

Ok, if you've read this blog for long, you know my relationship with most salads. I don't do them. I don't like most vegetables which kind of creates a problem since most salads include them. I do like the "not so salad, salads" as I call them. You know, the ones that are called salads but don't include anything remotely like lettuce. Today I have one such recipe for you!

One great thing about this time of year at my old job was all the great food that was brought into the office. My new job (as a stay at home mom) doesn't quite afford the same advantages. ;) Of course there are many other perks! I do miss that yummy food though. One of my favorites was brought by one of my supervisors. It is the perfect combination of tart and sweet. I could easily eat the entire bowl! So, when I needed a dish to take to the in-law's for Christmas I turned to this quick and easy recipe.


Grape Salad
Source: A Former Co-Worker

2 lbs green grapes
2 lbs red grapes (I just used all green grapes because I like them better)
1/2 cup white sugar
1 tsp vanilla
1 (8oz) pkg cream cheese
1 (8oz) sour cream
4 ozs chopped pecans (optional)
2 T brown sugar

Wash and dry grapes. In a large bowl, mix cream cheese, sour cream, sugar and vanilla. Add grapes and mix gently with a spatula or large spoon. Sprinkle with brown sugar and pecans, mix again and refrigerate for at least one hour before serving.

Tuesday, December 16, 2008

Coffee. Not Just An Amazing Beverage!


I love coffee, but I rarely brew it. I even have an awesome coffee maker. It's just that I am really the only one who drinks it. The hubs can be persuaded every now and again to have some, but usually it is just me. And I hate to brew just one or two cups at a time. So, my awesome coffee maker sits unused and my coffee sits in my cabinet.

Well, that coffee did not sit unused tonight! However, the poor coffee maker will have to wait a little longer. That is because this recipe uses coffee grounds, not the brewed concoction. On my quest to find a roast beef recipe I LOVE I made a coffee and cocoa crusted beef roast. I've heard of this combination used with beef before and finally found time to try it myself. I scoured the internet and read several recipes and decided I'd just use those as jumping off points. None of them actually called for roast beef. They were usually for a beef tenderloin or a ribeye steak.

So here is what I came up with:

Coffee and Cocoa Crusted Roast Beef


1 2lb. eye of round beef roast
1/4 cup coffee grounds, finely ground (I used a mortor and pestel to get mine more finely ground)
2 tbsp unsweetened cocoa powder
1/2 tsp ground mustard
1/2 tbsp ground ginger
1/2 tbsp garlic powder
1/2 tbsp chili powder
1/2 tbsp paprika
1/4 tsp cumin
1/4 tsp cinnamon
1/4 tsp cayenne pepper
1/2 tbsp sea salt
1/2 tbsp ground black pepper

Preheat oven to 325 degrees. Heat a sautee pan over high heat. Mix all ingredients except roast. Pat all sides of the roast with the mixture. Using tongs, sear each side of the meat in the hot pan. Then place roast in a roasting pan and cook covered for an hour and 20 minutes for medium well. Remove from oven and let rest of 10 minutes. Remove meat to a cutting board and slice. Pour pan juices over the sliced meat.

It had a nice flavor and we really enjoyed it. We had twice baked potatoes and biscuits to go with it. Now I plan to find something new to make with the leftover roast because the one thing I dislike more than plain roast, is leftover roast.

Monday, December 15, 2008

Run, Run As Fast As You Can...


You can't catch me, I'm the gingerbread man! My nephew loves this line from one of his books, so when he and my sister came over one day we made gingerbread men. We took a quick time saver by using the Pillsbury slice and bake cookie dough. Instead of slicing and baking, we rolled it out and cut out the little men. We then iced them with a simple mixture of powdered sugar and milk. They were fantastic and so much easier than making them from scratch! I highly recommend the Pillsbury gingerbread dough, especially if you need to save time when baking with children. Do you know any two years olds who are good at waiting??

Sunday, November 30, 2008

100!!!!

I don't have a recipe for you, I just wanted to cheer about having 100 posts! (Does it count if the 100th post isn't even a real post??) I'm not sure when I'll be posting again with all the holiday craziness, so in advance: Merry Christmas from our family to yours!

Thursday, November 27, 2008

Happy Thanksgiving!!!

I have a lot to be thankful for this year. I have a wonderful husband who got a new job that he loves. I have a beautiful, perfect, healthy baby boy. I have the best family a girl could ask for. And I am thankful that I managed to bake not one, but two items for thanksgiving without screwing them up!!!

For Thanksgiving with my family I made pumpkin cookies. I've been wanting to make these since I started my food blog and just never got around to it. My nephew, who is 2, was very excited because he loves pumpkins and he loves cookies. (I don't think he realized the cookies were made with pumpkin.) I tried to make them in the shape of a pumpkin to get even more smiles out of him, but it didn't work. These are strictly drop cookies, people. The directions say to drop them, and this is what you should do. Don't be like me and waste your time trying to press sticky cookie batter into a pumpkin cookie cutter. It just doesn't work. Other than my lack of a pumpkin shape, these turned out perfect!! I don't think I've ever said that in regard to baking before. This is a major milestone! The recipe can be found here.


These cookies are soft and cake-like, not overly sweet, and have a wonderful cinnamon-spice taste. YUM!

For Thanksgiving with the in-laws I made a strawberry cake.


I took a little help from the store and used a box mix, but I made it my own by letting a strawberry puree soak into the cake and I made my own cream cheese icing. This was actually the first cake I have ever iced! I was pleased with myself. :) (I have to thank my sister for the tip about using a butter knife to make the design on the top.) This cake was pretty easy and tasted really good!!!


Monday, November 24, 2008

If At First You Don't Succeed, Try Try Again!


I have yet to succeed in making a roast that I actually enjoy eating. Don't get me wrong, I'll eat it if it is my only meat choice. I've blogged about an attempt or two on here, and now I'm trying something different. I used McCormick Crusting Blends.
It was better than my previous attempts. The crusting on the ends was a little mushy, but overall, I liked it. I plan to try crusting something else soon.


I also made roasted potatoes with shallots and garlic to go along side the roast. I roasted the potatoes in a separate dish, but added them to the roast before serving.

French Onion, Pepper and Herb Crusted Roast


1 eye of round roast, 2 lb.
1 cup Worcestershire sauce
2/3 cup McCormick Crusting Blends, French Onion, Pepper and Herb flavor

Preheat oven to 325 degrees. Marinade roast in worcestershire sauce for 30 minutes to an hour. Coat roast with the crusting blend. Bake in the oven for approximately 1 hour 20 minutes to be cooked medium.

Roasted Potatoes with Shallots and Garlic

6 medium sized potatoes, cubed
1 small shallot, minced
3 cloves garlic, each clove sliced about 3 times to create chunks of garlic
1 tsp sesame oil
1 tbsp olive oil
salt and pepper, to taste

Place cubed potatoes into a baking dish. Add the shallots, garlic and oil. Toss to coat everything evenly with the oil. Add salt and pepper and toss again. Bake in the same oven as the roast for approximatly 45 minutes, or until potatoes are fork tender. (Normally I would bake these at 450 degrees for about 25 minutes, but I decided to just stick them in with the roast to save time.) Toss potatoes about half way through cooking. If you want them a little more brown, turn on the broiler at the end.

Friday, November 21, 2008

Long Time, No Blog

Don't worry, I have been cooking...just not blogging. I've managed to cook a few blogworthy items and even managed to take pictures of them, I just couldn't find time to sit down and write about them. So here are some recent things I've made:

Super Easy Potatoes Au-Gratin


3 potatoes, sliced thin (I used my mandolin so the slices would be the same thickness)
1 1/2 cups Half and Half (You could also use cream, but I happened to have half and half in the fridge)
1 tbsp garlic powder
1/2 cup parmesan cheese
Black Pepper, to taste

Pre-heat oven to 425 degrees. In a small sauce pan, bring the half and half to a boil. Stir often to keep it from burning. Once it comes to a boil, reduce heat. Add garlic powder, black pepper and parmesan cheese. Once the liquid has reduced and thickened, spoon a small amount into the bottom of a baking dish. Make a layer of potatoes and then spoon on more sauce. Continue to layer until you use up your potatoes. Top with the last of the sauce. Bake about 30 minutes. Once potatoes are fork tender, top with a little more parm and bake until top is golden brown.

Jaime's Shrimp Scampi


10 raw shrimp, peeled and deveined
3 tbsp butter
2 cloves fresh garlic, grated
1/2 tbsp dried dill
1 tsp red pepper flakes
pinch of salt and pepper

Heat sautee pan over medium high heat. Add butter. When melted, add grated garlic, dill and red pepper flakes. Sautee about a minute and add shrimp. When shrimp is cooked through and pink add shrimp and butter sauce to a small dish. So quick and so good!!! (I also made some cheesy brown rice to go along with the shrimp.)

Sunday, September 28, 2008

Pasta alla Carbonara


Bacon? Yum!  Garlic?  Yum!  Pasta? Yum!  Yeah, that pretty much says it all.  What more do you need?  Click here for Tyler Florence's recipe I used.  Fab-U-lous!  I did use cilantro instead of parsley.  I just like the flavor better.

Friday, September 26, 2008

Changing It Up

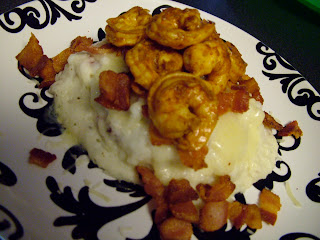
I took 2 recipes I previously blogged about and changed them up slightly.  I used the exact marinade I used for my shrimp skewers but sauteed the shrimp instead.  Then I made mashed potatoes just like the stuffing of my twice baked potatoes.  I think it turned out really nice.

Wednesday, September 24, 2008

Just Like the Real Thing

Ok, so I've been trying to eat healthier (ok maybe not healthier but better so I can get rid of this baby weight) and this morning I decided to have an egg white omelet.  It was perfect and thanks to Kate my omelet didn't fall apart like it usually does.  I wish I had taken a picture. 

Anyway, I searched for something to do with my leftover yolks and came across homemade mayonnaise.  Perfect!  I decided since I made my first near perfect omelet today, I would also try to make mayo for the first time.  I don't use mayo much except for in recipes.  However, Taylor LOVES mayonnaise, but he is very very picky about it.  He said it tasted just like the "real thing," but was a tad too acidic for him.  I thought it called for a lot of lemon juice, but I went straight by the recipe.  Next time I'll probably only use 2 tbsp of lemon juice instead of 3.

Homemade Mayonnaise

2 egg yolks
3 tbsp lemon juice
1/4 tsp salt
pinch of white pepper (I used black pepper since I didn't have white)
1 cup oil (I used vegetable oil)  

Whisk everything but the oil together until it is combined and smooth.  Then add the oil a drop at a time while whisking.  Ok, I tried really hard to whisk this by hand.  My arm about fell off!!  I ended up throwing it in the blender, and presto!  I had mayonnaise!

Homemade mayo will last in the fridge about a week.  This was plenty for us, but if you use a lot of mayo in one week you may want to double the recipe.

Saturday, September 20, 2008

I big puffy heart college football!

I love college football!  Especially Auburn football...and did you know (as of right now) there are 5 SEC teams in the top 10???  Southern boys know how to play ball!  I'm slightly nervous
about the Auburn vs. LSU game later tonight, but until then, here is some pretty good football game day food.  Nachos.  Enjoy, and WAR EAGLE!!!!


Nachos
Feeds 2 (in other words, make more for a party!)

1/2 lb. ground chuck
1 tbsp chili powder
1 tbsp garlic powder
1/4 tbsp cumin
1/2 tbsp paprika
1/2 can hot RoTel
1/2 can corn, drained
Tortilla Chips
Cheese, whichever kind you like best

Brown ground chuck and drain.  Over medium heat add the ground chuck back to the pan and add the spices.  Mix to combine.  Then add RoTel and Corn.  Let simmer 5-10 minutes.
Put your chips on a plate, add some cheese, top with meat mixture, and add some more cheese.  Quick, easy and yummy!

Tuesday, September 16, 2008

Macaroni Grill Comes to You


I saw this product on Dela's Blog and since I had a coupon, I decided to try it out.  It's a box dinner, much like Hamburger Helper, where you just add the meat and things like butter and milk.  It is slightly odd to me that a lot of restaurants are doing this now.  You can get California Pizza Kitchen frozen pizzas, TGIFriday's appetizers, and now Macaroni Grill Entree's all in the convenience of your local grocery aisle.  It tastes pretty darn close to the real thing, so why use the gas to make the round trip to your local eatery, wait for your food to arrive, and then leave a tip?  Unless you just like being served, which sometimes I do.  Sometimes you just need to go to a sit-down restaurant where you are the guest.  But anyway, back to this particular clone of your dining out favorites.

Of course I made some changes and didn't do it exactly like the box asked.  Where's the fun in that?  I didn't go too crazy with my alterations though.  Like Dela, I didn't use the sun dried tomatoes because I'm not really a fan.  I also was out of milk, so I used half and half.  Oh yeah, and I grilled the chicken instead of just sauteing it in the pan.

It was really good, but it had as many steps as making dinner that doesn't come out of a box so I probably won't buy it again since it is pretty expensive.  Unless I have another coupon. ;)

Saturday, September 13, 2008

Hash It Out!

I'm not sure why I became obsessed with making hash, but I did. I've never even had hash of any kind. Basically I was just thinking about some ground chuck in the freezer that I needed to use and I was tired of making hamburgers. I think I heard something about hash on the food network and it just got stuck in my brain. The more recipes I read the more I wanted to make it. Of course the most common type is corned beef hash. I've never had corned beef, but my first instinct is I wouldn't like it. Plus I had ground beef.


I didn't really find a recipe that stuck out, so I came up with my own. Hash is basically just a combination of finely chopped ingredients. However, the common ingredients seem to be meat, potatoes and onions. This would make a great "leftovers meal." I'm not using leftovers, but you totally could.


This meal really turned out great. I honestly wasn't sure if I would like it or not, but I even ate the leftovers the next day. For those who know me, you know this is a big deal. I don't usually like most leftovers. You should definitely give this a try!


Jaime's Hamburger Hash
2 tbsp olive oil
1 tbsp butter
1/2 lb. Ground Chuck
2 medium white potatoes, cubed
1/2 white onion, minced
1 clove garlic, grated
1 small can whole kernel corn, drained
1 can Hot RoTel (If you don't like it hot, you can sub any flavor of RoTel), drained of half the liquid

Heat a large pan over medium high heat. Add the ground chuck and use the back of a wooden spoon to break up the meat. Once the meat is browned, drain off the grease and remove from the pan. Add olive oil to the same pan over medium heat. Add butter. Once butter is completely melted, add the potatoes. Once potatoes have started to crisp up, add the corn and the onion. Saute until onions start to carmelize. Add the ground chuck back to the pan and grate the garlic over the mixture. Add the RoTel and stir to combine. Let simmer about 10 minutes letting the flavors combine.

Thursday, September 11, 2008

Shameless Plug :)

I've started a new blog.  It's not a food blog, so if that's the only type of blog you enjoy, you can stop reading now.  It is all about my life as a new mom.  Those of you who've been visiting my blog for a while know that I recently had my first child.  Becoming Mom is all about the wonderful and insane experiences I've had and will have.  Check it out and let me know what you think!

Wednesday, September 10, 2008

Cilantro Pesto Chicken and Crash Potatoes

Ok, it is fairly well known that I am a big fan of chicken and potatoes.  We have this meal fairly often because I am all about quick and easy and these items usually lend themselves to this concept.  Therefore I am always looking for new ways to do them.  Monday Taylor was off work and hanging out at home helping me take care of Logan, so I had a little more time than normal.  That is why I could try a little more involved marinade and potatoes that take a little longer than usual.

This chicken marinade comes from Weber's Real Grilling by Jamie Purviance.  I usually don't like it when guys have the same name as me, but I'll give this guy a pass because his recipes are THAT good! ;)

This book is awesome!  He has huge color photos for each recipe, which is a must in a cookbook in my opinion.  If it doesn't have pictures, I probably won't spend much time looking at it.  After all, we eat with our eyes first, right?  The same is true for me when perusing recipes.  What looks good usually gets my attention the quickest.

I've made pesto before and honestly it didn't turn out as good as the stuff you can buy in a jar.  I was inspired to try this recipe because it was a cilantro pesto and cilantro has to be my favorite herb ever!  I only had one addition to the marinade recipe and that was some vinegar because when I tasted it, it was a little bitter for my tastes.  The vinegar solved that problem for me.  This pesto didn't have any parmesan cheese in it, so I decided to make some parmesan crisps to go along with the chicken.  They didn't really turn out like I wanted, so I crumbled them over the chicken and it tasted great.  I really like the flavor of toasted parmesan cheese.  In the words of Rachel Ray, YUMO!

The potatoes didn't really turn out like the Pioneer Woman's crash potatoes, but they were good.  I used white potatoes, but I don't think I boiled them long enough.  They were fork tender, but they didn't smash all that well.  I also don't have a potato masher so I used the bottom of a heavy glass.  So maybe those reasons were my downfall.  They tasted good anyway. :)

Cilantro Pesto Chicken
Source: Weber's Real Grilling - Jamie Purviance

4 tbsp coarsely chopped walnuts
4 medium garlic cloves
3 cups loosely packed fresh cilantro leaves and tender stems
1 cup loosely packed fresh Italian parsley leaves and tender stems
1 tsp kosher salt
1/2 tsp black pepper
1/2 cup olive oil
3 chicken breasts

Pulse walnuts and garlic cloves in the food processor until it makes a paste.  Add the cilantro, parsley, salt and pepper until mixed.  Then stream in oil with the motor running.  Place the chicken in a resealable bag and marinade for 2 hours.

Monday, September 8, 2008

A New Look and A New Year

I decided it was time for a new look for the Burnt Toast Blog.  At the end of this month, I will have been blogging for a year.  WOW!  I have learned to branch out and try new things and I hope my food photography has gotten better in the last year.  Of course I still have a ways to go compared to many of my other food blogging friends.  (Check out some of the blogs listed on the left and you'll see what I mean!)  Hopefully I will participate is some more blogging events soon now that I am getting the hang of being a stay at home mom.  Happy Burnt Toast New Year!

Sunday, September 7, 2008

Shrimp Skewers

These are possibly the best grilled shrimp I've ever had!  One great thing about shrimp is they only need to marinade a short time.

Grilled Shrimp Skewers

20 shrimp
6 tbsp olive oil
1 tbsp garlic powder
1 tbsp chili powder
1/4 tbsp cumin
1/2 tbsp red pepper flakes
1/2 tbsp onion powder
1/2 tbsp salt
1/2 tbsp black pepper
1/2 tbsp honey
cilantro, hand torn
4 wooden skewers, soaked in water

Mix all ingredients except cilantro and let sit 30 minutes.  Place 5 shrimp per wooden skewer and grill.  Garnish with cilantro.


Tuesday, September 2, 2008

Quick, Easy and Smoky :)


I'm not sure when I started making these pork chops, but it has become my go-to recipe.  It is quick and easy and this rub really enhances the flavor of the chops.  These chops are perfect for a quick week night dinner because you don't have to remember to put them in a marinade for any length of time.  You can prepare a good amount of the rub and keep it in the fridge, then it takes even less time.

Tonight I decided to add an extra zing and use a little of my pepper sauce as a pre-curser to the rub.  I just added a little of the vinegar to the chop then patted it down with the rub.  These chops turn out great every time and they didn't disappoint.  The pepper sauce helped keep them nice and tender and added another layer of flavor.

Smoky Rubbed Pork Chops

2 parts chili powder
1 part cumin
1 part cayenne pepper
2 parts paprika
2 parts garlic powder
1 part sea salt
1 part sugar

Generously rub each side of the chops with spice mixture.  Let sit at least 30 minutes, then grill. Does it get any easier than that??

Saturday, August 30, 2008

Peppers, Southern Style


There are many southern specialties that are well known across the nation: bbq, grits, and fried chicken just to name a few.  One not so well known item is pepper sauce.  I know this because I searched many popular recipe sites to find a way to turn my abundance of serrano peppers into this southern style seasoning and only found recipes for hot sauce.  Pepper sauce is not hot sauce.  Basically it is peppers that have marinated over time in vinegar and therefore the vinegar becomes hot like the peppers.  You can eat the peppers, but the vinegar is most often used as a seasoning over bitter greens like collards or turnip greens.  Making pepper sauce was the first suggestion my grandmother had when I told her I had more peppers than I knew what to do with.  Of course, I don't eat any kind of greens, but I make a lot of marinades and I think the pepper infused vinegar would be a great addition.  Not to mention it just looks pretty sitting on my kitchen counter!

I found recipes on www.southernkitchen.blogspot.com and www.thesoutherndish.com  and merged them.  Next I am going to use my extra peppers to infuse olive oil. :)

Southern Pepper Sauce

peppers, any kind you like or any combination thereof
white vinegar
glass bottle with cap

Measure how much vinegar you need for your bottle and remember the peppers will take up some room as well.  Bring the vinegar to a boil and reduce to a simmer while you prepare the peppers.  You don't really have to do anything other than wash the peppers, but I chose to prick each one several time with a straight pin so they would release their hotness quicker.  Add the peppers to the bottle then pour in the vinegar.  The longer it sits the better it will be!  No refrigeration is necessary!

Thursday, August 21, 2008

Blog Block

I've been experiencing a little blogger's block lately. I guess one major contributing factor is lack of time. I used to spend a lot of time and energy thinking about what I was going to make for dinner and then writing about it here. Now, we usually look in the fridge and make a last minute decision. And if we are lucky Logan might sit in his swing long enough for Taylor and I to get to eat at the same time. So blogging has taken a back seat. I don't have time to take pictures of my food or even think about typing out a recipe while taking care of an 8 week old.

Maybe when he's older I'll have more time. In the meantime, I'm trying to make mor figure friendly meals to get off this baby weight since I am in a wedding in less than 2 months and I ordered my pre-pregnancy size. Yes, I am crazy! ;)

Even more than blogging, I've missed reading my favorite blogs and trying out all their recipes. Maybe one day I'll get a little more time for those things, but at the moment my life revolves around making bottles, washing clothes, and changing diapers. Maybe I'll write again when he's 5????

Friday, August 8, 2008

Peppers!

My pepper plants have been on production overload! These are the serrano peppers, but the cayenne are coming in too. They taste great! I encourage everyone out there to try growing your own. If I can do it, anyone can! All I did was water them, and I didn't even do that every day. ;)

Comfort Food

It seems I have found the time to cook, but finding the time to blog about it is a completely different story. I started this post several weeks ago, but between feeding Logan and trying to nap when he does, I just haven't found the time. So, here is my overdue post on comfort food. O and the recipe is kind of lacking, but cut me some slack. I barely had time to post this. ;)


My first venture back into the kitchen was all about comfort. A friend of my mother-in-law's makes these AWESOME blueberry fried pies. They have a soft, biscuit-like crust instead of the normal flaky, pie crust. I would be the size of a house if I had them very often.


I was craving them a few weeks ago and decided to try and duplicate them. I had some frozen blueberries and some canned biscuits. I searched the web for a recipe for blueberry pie filling and what resulted was pretty good; not as good as the original though. I think the biggest problem was that I only had Pilsbury Grand's biscuits and they puffed up too much. No matter how hard I tried to seal the edges, the filling would start running out before they could get cooked all the way. I ended up frying them on both sides then finishing them in the oven.


They might not have been perfect, but they hit the spot!


Blueberry Fried Pies

1 can refrigerated biscuits
butter for frying
blueberry filling (recipe found on google)


Heat butter in sautee pan over medium high heat. Roll out each individual biscuit and place a spoonfull of filling in the middle. Fold over and seal edges. Fry until brown on both sides and biscuit is cooked through.

Monday, July 7, 2008

I've been MIA, but I have a good excuse!!!


I haven't been cooking because our little boy decided to FINALLY arrive June 27. So I haven't been cooking at all since then. Just trying to get the whole mommy thing down. He is adorable and perfect and we are completely in love with him. In a few weeks hopefully I'll have more of a routine and have something blogworthy to post.

Wednesday, June 25, 2008

Summertime and Strawberries


Wow, it's been a while since I've posted. Things have been a little crazy while we await the arrival of our son. Which by the way, I thought would have already happened. My due date is actually today, but Logan shows no signs of gracing us with his presence.

Anyway, you would think I would cook more now that I'm no longer at work, but in fact, the opposite is true. Don't get me wrong, I cook, but not much has been blog worthy. Until today. The temperature gauge at my house registered 102 by noon and there was no way this 9 month pregnant girl was venturing outside other than to water my plants. I needed a way to cool off and my thoughts immediately turned to a recipe I'd been hanging on to for quite some time. Strawberry Pineapple Sorbet. Relatively healthy and icy cold! Perfect!

It turned out icy and refreshing, but I think next time I'll stick with just strawberries. I love pineapple, but I guess when it comes right down to it, I'm a strawberry purist. It definitely looks the part of the perfect summertime dessert. Summertime and strawberries, the perfect combination!


Strawberry Pineapple Sorbet

1/3 cup granulated sugar
3 cups sliced strawberries
1 small can pineapple (drained of juices)
1 pinch salt

Put strawberries in a bowl with sugar. Cover and allow to sit for 1 hour, stirring occasionally. Using blender, combine strawberries with their juices, pineapple and the pinch of salt. Puree. Refrigerate mixture for at least 1 hour until puree is chilled. Place in ice-cream maker and follow manufacturers instructions.


**I typed the recipe exactly as Amber posted it. I did things a little differently though. I used frozen strawberries because the price of fresh ones has skyrocketed around here. I let them thaw most of the way then just added them to the blender with the sugar and other ingredients. It didn't need to chill since the berries were partially frozen so I added it straight to the ice-cream maker. 25 minutes later, sorbet!

Tuesday, June 17, 2008

The Fridge is Full of Leftovers!

I'm not a big fan of leftovers normally. I am getting better, but I'm just not a big fan of eating things twice in such a short span of time. I don't care how good it was the first time around, most things are not as delectable reheated.


Of course we keep all our leftovers and thankfully my husband is pretty good about eating them. I try to find ways to use them in new dishes so I can trick myself into thinking I'm eating something different.


Last week the fridge was starting to overflow with random leftovers. I had no idea what to do with them to make them more appealing so I could convince myself to eat them. Thankfully a fellow blogger came to rescue. I was browsing Delish and she had just posted about Crescent Chicken Pockets. They looked really good and I got to thinking about the crescent rolls I had in the fridge and maybe I could combine some of the leftovers to make my own crescent pockets.


Mine were nothing like hers because I let my fridge lead the way and most of my leftovers had a decidedly Mexican theme so I went with it. They turned out pretty good and I can see us employing this technique many times in the future. My husband said that if we had used Italian ingredients they would have been like homemade calzones.


Crescent Pockets

Source: Delish

refried beans
2 leftover grilled chicken strips
3 leftover fried potatoes, with one minced shallot
leftover corn, sauteed with minced garlic, cumin, lime juice and cilantro
wrapped in crescent rolls, sprayed with olive oil
topped with bread crumbs mixed with a little dry ranch dressing mix

Sunday, June 15, 2008

Father's Day Dessert, the Semi-Homemade Way

Let me begin by saying that I'm not a huge fan of Sandra Lee and her Semi-Homemade show. Not that she doesn't have lots of good ideas, but with her intricate tablescapes and cocktails galore it's a little too much for me sometimes. My sister and I like to call her show Semi-Sober since she is ALL about the alcohol. ;)


Anyway, I did take a page from her book for my father's day dessert. I volunteered to bring something sweet to my in-laws for their father's day celebration and I wanted to use ingredients I already had on hand since I have already done my grocery shopping for the week. I happened to have a Jello Oreo No Bake Dessert (yes, a dessert in a box) in my pantry. It's really quick, easy and best of all, good!

I wanted to jazz it up a little though, so I decided to make individual frozen oreo cheesecakes. The idea to put them in cupcake liners was on the back of the box, so I can't take credit for that. I liked the idea of smaller portions, especially since my father-in-law is diabetic and he can only eat sweets in small quantities. I also decided to add cream cheese to the filling to make it more of a cheesecake than just a cream. I only added 4 oz. of cream cheese because I honestly wasn't sure how it would turn out.


They were really good with a hint of the tangy cream cheese in the filling. Next time I'll probably add the full 8 oz. to make it more cheesecake-like. But hey, you live and learn. The small portions were a hit and made it an easy to eat dessert. Keeping them frozen also made them easier to eat. Once they start to thaw, you need a fork!


So for father's day I kept it simple and semi-homemade. ;)

Tuesday, June 10, 2008

Recreating a Masterpiece


Ok, so maybe not a masterpiece but the Fried Macaroni and Cheese at The Cheesecake Factory is my all time favorite appetizer. Talk about the ultimate comfort food! I go there just to order that fried cheesy goodness.


I've had some leftover risotto in my fridge a little over a month now and I've been planning to make risotto cakes by frying the leftovers. Not that I've ever done it before, but that was the suggestion I got when I asked for my fellow bloggers input. I've been waiting for a night when I would be eating alone, since the husband would not be a fan, and when I would have the time and patience to experiment.


Now I realize risotto and macaroni and cheese are not the same thing. But, you've got a starch and lots of cheese so they are pretty close. The real recreation was the sauce. When you order Fried Macaroni and Cheese at The Cheesecake Factory, it comes plated on a tomato cream sauce that perfectly complements the heaviness of the fried pasta and cheese. I knew I wanted a similar sauce with my Fried Risotto.


The sauce came together pretty effortlessly and I must say it tasted pretty darn close to the original. I actually wish I had made more! The risotto cakes were a little harder. I let the risotto defrost most of the way and patted it into cakes. I then dipped each cake into flour, then egg, then seasoned bread crumbs. Easy, right? Wrong! The cakes began to fall apart when I put them in the egg mixture. I then had to re-make the cakes to add them to the bread crumbs but then they fell apart again! So, I ended up with everything kind of mixed together, pressed back into a cake and topped with more breadcrumbs.


They still turned out very tasty, but I'm sure it wasn't supposed to be that hard. So, anyone out there who has a suggestion as to how to keep my cakes together so that inside is just risotto and not a mixture of the breading as well please enlighten me.


All in all, I really enjoyed my recreation of the masterpiece. The sauce was perfect and the cakes weren't bad either. :)


Fried Risotto with Tomato Cream Sauce
Source: Me

Leftover Risotto formed into patties
1 dish of flour
1 dish with 1 large egg, beaten
1 dish with seasoned bread crumbs
olive oil for frying
2 tbsp marinara sauce
2 tbsp Alouette Herb & Cheese Spread
1 tbsp parmesan cheese
pinch of salt


Dip each patty into the flour, then the egg, then the bread crumbs. Add oil to a skillet over medium heat and fry until golden brown. Remove to a plate and prepare sauce.

Add marinara to a pan over medium heat and warm through. Add the Alouette and stir until combined. Add parmesan and pinch of salt.

Place the sauce in the center of a plate and top with risotto cakes. You can top with extra sauce if you have any and/or parmesan cheese.

Alabama is Hot Hot Hot!!!


But my impatients are thriving! As long as they get their daily dose of water. Thank goodness this is the one the flowers I can keep alive. :)

Friday, June 6, 2008

Shrimp Biscuits


I didn't want a real heavy dinner last night (and it was just me since the husband had to work late), so I decided to make little shrimp sandwhiches. I used some garlic crescent roll dough I had in the fridge, but instead of making crescents I put it in a bowl and added some parmesan cheese to it. I then rolled it out and cut it like biscuits. I left it pretty thick because I wanted it to rise enough to have bread and shrimp in every bite!


I made up a marinade for the shrimp and let it sit about 45 minutes. I just cooked mine in a skillet, but they would have been great grilled or broiled too! Unfortunatly I overcooked my shrimp a little, but these were still really good. And I ate the leftovers tonight!


Balsamic Basil Shrimp


1/2 lb. frozen large shrimp peeled, de-veined and thawed

1/2 cup balsamic vinegar

1/2 cup olive oil

1/4 tbsp cayenne pepper

2 cloves garlic, minced

1 tbsp fresh basil, minced

1 tsp salt


Improv, It’s Not Just for Comics Anymore!


Who said you have to be a comedian to be good at improvisation? Ok, so maybe no one has ever said that, but just go with me here. In the realm of cooking you need to be able to go with the flow and change plans midstream sometimes. This seems to happen to me most in the world of baking; even when the baking is easy and simple…or should be. This probably stems from my lack of education in this department and not always knowing if it is ok to sub some things for others.

A while ago I printed off The Pioneer Woman’s recipe for Apricot Bars. They looked incredible. Well, everything she cooks looks incredible. Her pictures make me want to eat things I don’t even like! For instance, I don’t like apricots. I knew it wouldn’t be hard to substitute strawberries though. I don’t think this is where it went wrong.

It also calls for brown sugar. Now I’m sure brown sugar complements the apricots rather well, like it would apples. But in my experience, I’m not a big fan of it combined with strawberries. So, I decided to use white granulated sugar instead. I don’t know if this caused the problem or not.

The problem is that my bars never really got brown and the didn’t really harden. It came out more like a crisp; tasted great by the way, but that wasn’t the point. I wanted the cute little bars PW came out with. Oh well, maybe I’ll try it again with apple and brown sugar. If anyone has any ideas as to why mine didn’t really work out, let me know. FYI, I followed all the other directions to a “T.” I promise!!
**Update! I revisited my bars the next day and they actually stayed together like bars!! I think I tried to cut and eat them before they had really cooled completely. (I'm not a very patient person...another problem with me and baking) Also, I did them in a 8" square pan like suggested, but next time I think I'll do them in something larger so the bars will be thinner. I think they will stay together better that way.**

Strawberry Bars turned Strawberry Crisp
Original Source: Apricot Bars from The Pioneer Woman

1 ½ cups flour
1 tsp baking powder
½ tsp salt
1 ½ cups oats
1 cup packed brown sugar (this would be where I used white granulated sugar)
1 ¾ sticks cold butter, cut into pieces
1 10-12 oz. jar apricot preserves (I used strawberry)

Mix all ingredients except the preserves. Press one half of the mixture into a buttered 8” square baking dish. Spread with the preserves. Sprinkle other half of mixture on top and pat lightly. Bake at 350 degrees for 30-40 minutes or until light brown. Let cool completely, then cut into squares.

Thursday, June 5, 2008

I'm it!! ;)

I was tagged for a meme by Celeste at Sugar & Spice! These are always a lot of fun and you get to learn more about the people whose blogs you read regularly. If you haven't checked out Sugar & Spice, you need to do so, if only for her amazing photos of the food she has made. She is an awesome photographer!


The rules:Each player answers the questions about themselves. At the end of the post, the player then tags 5 people and posts their names, then goes to their blogs and leaves them a comment, letting them know they’ve been tagged and asking them to read your blog. Let the person who tagged you know when you’ve posted your answer.

1. What was I doing ten years ago?

10 years ago, I was 16 and it was the summer before my senior year in high school. WOW! I can't believe it is almost time for my 10 year reunion. Now I don't know if I like this meme. It makes me feel old! LOL! I think I was working at a daycare over the summer and probably just hanging out with friends. I'm sure I was very excited to start my last year of high school!

2. What are five (non-work) things on my to-do list for today?
  1. Empty the dishwasher
  2. Wash clothes
  3. Figure out something for dinner tonight
  4. Water the flowers...it's been 90 degrees or more this week in Alabama! Not fun at 8 months pregnant!!!
  5. Oh yeah, and I'm supposed to be resting before the baby gets here. So I plan to lay down with a good book!

3. Five snacks I enjoy:

  1. Doritos, especially the spicy varieties
  2. Cornflake Clusters (get the recipe here)
  3. Ice Cream Sandwiches
  4. Strawberry smoothies
  5. Cereal (these days the choice is Lucky Charms)

4. Things I would do if I were a billionaire:

  1. Finish my back yard: a pool, landscaping the whole deal!
  2. Finish my basement and garage like we would really like
  3. Buy a condo at the beach
  4. Pave the roads of my subdivision!!
  5. Pay off my house and the houses of family members

5. Places I've lived:

  1. Grayson Valley (Birmingham), AL
  2. Auburn, AL
  3. Southside (downtown Birmingham), AL
  4. Trussville, AL
  5. Odenville, AL

6. Jobs I've had:

  1. Daycare worker
  2. Office Assistant at Land Title Company
  3. March of Dimes - Public Relations Intern
  4. Gymnastics Coach
  5. Public Relations at Land Title Company
  6. Post Closing Assistant at Land Title Company

Here we go! TAG, you're it...

Jen at Look Out Bobby Flay!

Erin at Mommy Meals

Dela at Not Your Mama's Southern Cooking

Patsy at Friends, Family and Food

Emiline at Sugar Plum

Tuesday, June 3, 2008

Bacon Cheeseburgers...Sort of

My husband has been wanting "plain" burgers. That means just salt and pepper to flavor the meat. Of course I like a little more flavor action, but he had a rough week last week and I wanted him to have something he would really enjoy. He loves bacon cheeseburgers, so that was the plan...for him anyway. I even made sure we had lettuce and all his favorite condiments so it would be his perfect burger.

I wasn't about to eat a plain old burger when I was at my own house and had the option not to. I decided to make a cilantro chipotle mayonaise to add a little spice. I'm also not a big bread person (I'd rather just have the meat) so I did without a bun and crumbled my bacon on top of the mayonaise. I forgot to add cheese to mine in my hurry to eat, which is odd because usually the cheese is my favorite part. But as has been stated previously, there is not waiting when it comes to food these days. The hunger just takes over!

For the "fries" I did grilled potato wedges basted with garlic olive oil. They turned out really well and the garlic didn't overpower them. I can be a bit heavy handed with seasoning, so I'll have to remember this for when other people come over. I sometimes forget not everyone loves garlic as much as I do. ;) We also had baby dill pickles with our burgers and fries.


Please excuse the ghetto plastic plate. As you can tell it has been microwaved and used quite a bit and has a little wear and tear. It's about the food people. Ignore the plate.


Cilantro Chipotle Mayonaise

2 tbsp mayo
1/4 cup chopped cilantro
1 chipotle in adobo, minced
1 tsp lemon juice
1 1/2 tsp thai chili paste


Grilled Potato Wedges

4 Idaho potatoes, "baked" in the microwave until tender (about 7 minutes)
2 tbsp olive oil
1 clove garlic, pressed
sea salt
cracked black pepper

Cut the potatoes into wedges. Mix the other ingredients in a small bowl. Place on the grill and baste with the garlic olive oil. After about 5 minutes, turn to the other side. Baste again. After the potatoes are crispy and have slight grill marks, remove from grill and toss with remaining olive oil.

Monday, June 2, 2008

I love learning new tricks!


Yesterday was our Sunday to bring breakfast or snacks to Sunday School. I have been craving blueberries, a fact which was spurred on by Kate and all her blueberry posts. I decided I would make blueberry muffins...from scratch! A first for me, and my first official act as a stay at home mom. ;)


I found this recipe on Patsy's blog: Family, Friends and Food. The title does not lie; Melt-in-Your-Mouth Blueberry Muffins. They are excellent and I had many compliments on them yesterday morning. They really aren't much more complicated than opening the bag of muffin mix that I normally use.


But here is where the title of this blog comes in. I learned a new trick! I love learning the basics of cooking and baking so I can improvise more easily, especially when I do not have the called for ingredients readily on hand and a mad dash to the store is just not happening. In these cases, google can be a girl's best friend.


This recipe called for sour cream. I know I read that originally, but it slipped my mind until I looked it over again Saturday night. I didn't have any sour cream! Google came to my rescue and I found that you can substitue 3/4 cup sour milk plus 1/3 cup butter when a BAKING recipe calls for sour cream. Great! But how do I get sour milk? (or you can use buttermilk but I don't have any of that either!) I just googled that also and found that if you add 1 tbsp lemon juice or white vinegar to 1 cup of milk and let it sit for 10 minutes you have sour milk! So, I used this little trick instead of jumping in the car and going out to get sour cream.


Also, I only had 1 egg and the recipe calls for 2. I did originally have 2 eggs but broke one on accident...long story, not going there right now. ;) I decided to just add a little oil to the one egg and call it a day. Both my substitutions did not seem to harm the outcome of the recipe and I was proud of my ingenuity! I am learning something through all this cooking and food blogging!


Melt-in-Your-Mouth Blueberry Muffins
Originally from: Summer Gatherings, Rick Rodgers

2 cups all-purpose flour
2/3 cup sugar
1/2 tsp baking soda
1/2 tsp baking powder
1/4 tsp salt
2 large eggs
1 cup full fat sour cream
5 tbsps unsalted butter, melted and cooled slightly
1 1/2 cups fresh or frozen blueberries


Preheat oven to 350 degrees. Line 10 muffin tins with paper liners. I got 18 muffins out of this...well 12 full sized ones and 6 1/2 sized ones...I had too much batter for just 12 muffins. Also, I didn't use liners. I just sprayed the pan with cooking spray.


Sift dry ingredients into a medium bowl. Beat the eggs until combined in another medium bowl, then stir in sour cream and butter. Add to dry ingredients and stir just until moistened. Foldin blueberries. Spoon equal amounts into each muffin tin.


Bake until golden brown, about 20-25 minutes. Mine took exactly 21 minutes. :)


Sunday, June 1, 2008

"I'm not eating that."

That is what my husband said when I told him we were having roasted cauliflower with our steaks. He doesn't like cauliflower (in any way, shape or form according to him) and he just flat out wasn't eating it. I love raw cauliflower, but am usually not a fan of the cooked stuff. However, I've seen more than one blog post about how wonderful roasted cauliflower is and I am always looking for new side dishes that don't include corn or potatoes since those are my default sides. I begged him to just taste it and promised I would make him another option in case he was right and didn't like it.


Well, he didn't like it and I wasn't a huge fan either. I think I just don't like mushy cauliflower. When it is cooked, it loses it's bite and the crunch is the best part. I did however like it before I roasted it. Ha! I tasted a few pieces befor putting it in the oven and it was really good. I could have eaten the whole pan just like that as a snack. Maybe next time I'll just do that! It has a good flavor though, so if you liked cooked cauliflower, give it a try.


Oven-Roasted Cauliflower with Garlic, Olive Oil and Lemon Juice

Source: The Recipe Girl My additions/changes in italics

6 cups cauliflower florets (I just used a whole head)


2 tbsp olive oil


1 tbsp sliced garlic (I minced mine)


2 tbsp lemon juice


1 tsp kosher salt (I used sea salt)


1/2 tsp ground black pepper


2 tbsp parmesan cheese


chopped chives, for garnish (I used some dill I had instead)


Preheat oven to 500 degrees.


Place the cauliflower in a roasting pan (I used a rimmed baking sheet). Drizzle with olive oil and season with garlic, lemon juice, salt and pepper. Toss to coat cauliflower. Place in oven and cook 20-25 minutes, stirring occasionally.


Remove from oven and sprinkle with parmesan cheese and garnish with chives. Serve while warm.

Friday, May 30, 2008

So hungry I forgot to make a side dish!

Yes, it is true. When I got home from work last night I was so hungry I completely forgot to start the potatoes. Actually, I was on the phone with my husband when I walked in the door. Since he is working 2 jobs right now I hardly see him and sometimes talking on the phone is the only talking we do. So, I was a little distracted. But, let's just call this what it is...baby brains coupled with crazy pregnancy appetite!

I saw Paula Deen's recipe for Basil Grilled Chicken on the Food Network website yesterday afternoon and decided that would be dinner. Yes, I start thinking about dinner as soon as lunch is over. This baby must be going through a last minute growth spurt. ;) (Or at least that is what I tell myself) I knew I would just do something simple with potatoes to go with it, but they never crossed my mind again after I got started on the chicken. Usually I begin work on the side dish while the meat is marinating, but this recipe doesn't have a marinade time.

Since I didn't realize I didn't have anything to eat with the chicken until it came off the grill, I decided to eat in shifts. I told you I was starving, so I couldn't possibly wait until I got the potatoes fixed. Plus, the chicken smelled wonderful and I was so excited that I got to use the first basil from my Garden in a Bag project! I couldn't wait to taste it.

This is a great, quick grilled chicken dish. Like I said, no marinating required and it has tons of flavor. I will definitely make it again! I reduced some of the butter since I was using cutlets instead of whole breasts. Plus, we all know how much Paula Deen loves that stuff and it seemed a bit on the heavy side to me. You will notice from the pictures though, it is still a lot of butter!


Basil Grilled Chicken
Source: Paula Deen

3/4 tsp coarsely ground black pepper
4 skinned chicken breast halves (I used boneless, skinless chicken cutlets)
1/4 cup freshly chopped basil leaves, plus 2 tbsp freshly minced basil leaves
1/3 cup (5 tbsp) butter, melted plus 1/2 cup (1 stick) butter, at room temp. (I only used 4 tbsp melted and I used 5 tbsp at room temp.)
1 tbsp grated parmesan
1/4 tsp garlic powder
1/8 tsp salt
1/8 tsp pepper
Fresh basil, for garnish


Press the coarsely ground pepper into the meaty side of the chicken breasts (I did both sides since mine were cutlets). Stir chopped basil into the melted butter and brush chicken lightly with this mixture.


In a small bowl combine softened butter, minced basil, parmesan, garlic powder, salt and pepper. Beat at low speed with an electric mixer until smooth. (I just used a spoon to combine everything and it worked out fine). Transfer to a small serving bowl.


Grill the chicken , basting frequently with the remaining melted butter mixture.

Serve the chicken with the basil-butter mixture and garnish with fresh basil. (I just went ahead and spread the basil butter on the chicken as soon as it came off the grill)

*Also, I had a good bit of the basil butter mixture left over, so when I got around to making my potatoes, I just fried them in a mixture of olive oil and the remaining basil butter. They were great!

Thursday, May 29, 2008

An Ending and A New Beginning

Ok, I have a bit of an attention-whorish beginning to this post, but I am just so excited I can not contain myself any longer! Tomorrow is my last day at work!!! I feel like I've been waiting my whole life to be a stay at home mom and as of tomorrow at 4:30, the new adventure begins. Even though my little boy (hopefully) won't be making his appearance for another few weeks, I'm going to be using my work-free time to get the house in order and try to get some rest before the sleepless nights I'm sure to endure soon.

I'm also hoping I'll have some time to try out some new recipes I haven't been able to get to yet. I know there will be a lull in blogging once my little one arrives, so I plan to get a lot in before that happens. Mostly they are dessert recipes that involve baking, and knowing my track record in that department, I don't need to be trying out any of those as a new sleep-deprived mom.

Speaking of new recipes, I tried out a new pork chop recipe earlier this week. I saw it a while back on Celeste's Sugar & Spice. Honestly they were a bit too much work for a weeknight in my opinion, but of course they tasted great so my husband has requested to have them again. And we will, because they were really good and because did I mention I don't have to go back to work after tomorrow??? He says I should have the time now. ;)

The chops were perfectly crunchy and I loved baking them instead of frying them. Not only is it more healthy, but I just don't like to eat greasy meat. And putting them on a rack inside the rimmed baking sheet keeps the bottom from getting soggy. I also roasted some corn in the husks in the oven while the chops cooked. I then cut it off the cob and tossed the kernels with butter, cilantro, garlic powder, onion powder, salt and cayenne pepper. Yum!


Ultra Crunchy Baked Pork Chops

Source: Sugar & Spice, recipe originally from Cooks Illustrated
(my additions/changes in italics)

4 boneless center-cut pork chops, 6 to 8 ounces each, 3/4 to 1 inch thick, trimmed of excess fat
4 slices hearty white sandwich bread, torn into 1 inch pieces
1 small shallot, minced (about 2 tbsp)
3 medium garlic cloves, minced (about 1 tbsp)
2 tbsp. vegetable oil
Ground black pepper
2 tbsp. grated parmesan cheese
1/2 tsp. minced fresh thyme leaves (I didn't have any, so this got omitted)
2 tbsp. minced fresh parsley leaves
1/4 cup plus 6 tbsp. unbleached all-purpose flour
3 large egg whites
3 tbsp. Dijon mustard
Lemon wedges

Directions:

Adjust oven rack to middle position and heat oven to 350 degrees.


Pulse bread in food processor until coarsely ground, about eight 1-second pulses (you should have 3 1/2 cups crumbs). (I didn't want to dirty up more dishes, so I did this by hand. It wasn't hard at all and made the crumbs more rustic. I really liked it this way)

Transfer crumbs to rimmed baking sheet and add shallot, garlic, oil, 1/4 tsp. salt, and 1/4 tsp. pepper. Toss until crumbs are evenly coated with oil. Bake until deep golden brown and dry, about 15 minutes, stirring twice during baking time. (Do not turn off oven.) Cool to room temperature. Toss crumbs with Parmesan, thyme, and parsley.

Place 1/4 cup flour in pie plate. In second pie plate, whisk egg whites and mustard until combined; add remaining 6 tbsp. flour and whisk until almost smooth, with pea-sized lumps remaining.


Increase oven temperature to 425 degrees. Spray wire rack with nonstick cooking spray and place in rimmed baking sheet. Season chops with pepper. Dredge 1 pork chop in flour, shake off excess. Using tongs, coat with egg mixture; let excess drip off. Coat all sides of chop with bread crumb mixture, pressing gently so that thick layer of crumbs adheres to chop. Transfer breaded chop to wire rack. Repeat with remaining 3 chops.

Bake until instant-read thermometer inserted in center of chops registered 150 degrees, 17 to 25 minutes. Let rest on rack 5 minutes before serving with lemon wedges. (I just squeezed some lemon juice over my chop before eating and it was great!)