Wednesday, April 30, 2008

Playing with Fire

I love the flavor of grilled food. And I don’t mean on a charcoal grill. I’m talking about a big propane gas grill. Even with the price of gas these days I can’t switch over to charcoal. I just don’t like how the edges of everything get all charred and taste burnt to me. I guess it is because I grew up with a gas grill and it is just what I am used to. My husband on the other hand grew up with charcoal and thinks it isn’t REAL grilling unless you pour a ton of lighter fluid on those little charcoal briquettes and have a flame that soars to high heaven. I really think he just likes playing with fire and it’s not so much about the flavor, especially since he usually praises my grilling skills on our gas grill. Actually, I know this is true because he loves anything that has to do with him creating fire. It must be a man thing. And to think, I am bringing another one into the world. It makes me shudder to think of the things my husband is going to want to teach our son. ;)


Grilled pork chops were on the menu this week and I’ve been wanting to use chipotles in adobo for quite some time. I thought the two would pair nicely and went off to find some inspiration. I saw a recipe for Garlic Roasted Pork Loin with Raspberry Chipotle Glaze from Emeril on the food network website. I am not a fan of raspberries but decided to look over the recipe anyway. I basically just used his recipe as a jumping off point, but you can find the original here. My glaze really added another layer of flavor to the chops. I did not particularly like the cut of chops we had because it was too fatty to me, but the variety pack was what was on sale, so there you go.

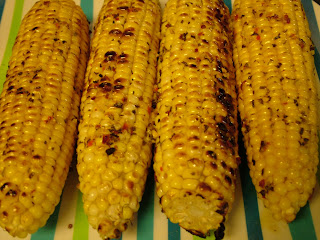
The grocery store also had ears of sweet corn on sale again, so I grilled some to go with the chops. This time I grilled them without the husks and basted them with Mediterranean Sea Salt butter every time I turned them. I had a coupon for McCormick's Mediterranean Spice Sea Salt and decided to try it out on the corn. I am in love with this stuff! I can't wait to use it on potatoes. :)

Grilled Garlic Pork Chops with a Chipotle Glaze
Source: Me

2 bone-in pork chops
2 cloves garlic, sliced thin
1 tbsp olive oil
adobo sauce, from the chipotles
salt & pepper, to taste


Make small slits on both sides of the pork chops and place a slice of garlic in each one. Brush both sides of chops with olive oil and some of the adobo sauce and season with salt and pepper. Grill until done.


1 tbsp olive oil
1 shallot, minced
2 cloves garlic, minced
2 chipotle chiles in adobo, chopped
1/2 cup rice wine vinegar
1 tbsp granulated sugar
1/2 tsp salt


In a medium saucepan, heat oil over medium-high heat. Add the shallots and cook, stirring, until soft and slightly caramelized, about 4 minutes. Add the garlic to the pan and saute for 1 minute. Add the chipotles and cook, stirring continuously, for 1 minute. Add the vinegar and stir to deglaze the pan. Add the sugar and salt, and bring to a boil. Reduce the heat to medium and simmer until thickened and reduced by half, 8 to 10 minutes. Top chops with glaze and allow to rest about 10 minutes before serving.

Tuesday, April 29, 2008

Creamy and Cheesy: A Labor of Love


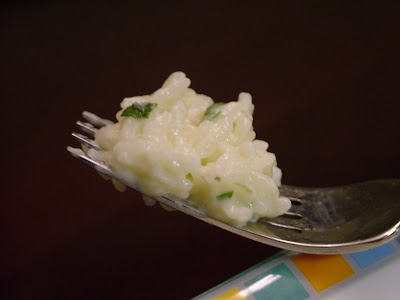
Yep, I'm talking about risotto. I've made it once before, a smoked gouda version you can find here. This time I kept it simple, just a basic parmesan risotto. The recipe came from the pioneer woman and it was FANTASTIC!! This, by itself, was my meal. The hubs wasn't too thrilled to have a dinner that didn't include meat, but he had to work late and tonight I was cooking for me. I put the leftovers in the fridge in case he wants some when he comes home, but I won't be surprised if I find them in the same spot I left them tomorrow morning. Oh well, that just means I'll have a yummy lunch tomorrow!

PW’s Perfect Risotto
Source: The Pioneer Woman
-my changes/additions are in italics


1 tablespoon olive oil
1 tablespoon butter
1 small or 1/2 medium onion - I used 1 shallot
3 to 4 cloves garlic
1 pound Arborio rice - I used Jasmine rice because it's what I had
7 to 8 cups chicken broth
1 to 1 1/2 cups heavy cream
2 cups (total) grated Parmesan, Romano, and/or Asiago cheese - I just used parmesan
Salt & Pepper to taste
Chopped chives - I used chopped cilantro since I had some that was about to go bad.

Heat oil in large skillet, then add chopped onion and garlic and cook until soft. Dump in 1 pound dry Arborio rice, and stir to coat. Then add the broth, in 1-cup increments, stirring after each addition until liquid is absorbed. Rice is done when it no longer has a hard bite. After all liquid is absorbed, add cream, cheese, salt & pepper, and stir to combine. Stir in chives and serve immediately.

This recipe makes a TON of risotto. I am going to freeze some of mine and see how it reheats. This recipe could easily have been halved and still fed the 2 of us for a few days. LOL!


Treasure Hunting


Saturday I went to Nashville with my mom, and we went to one of the biggest flea markets I have ever seen. It was huge! We weren’t really looking for anything in particular, but I did happen to stumble across a few things. I got a great deal on a shelf for the nursery. It was probably the deal of the day! I also got a few things that will eventually show up in this blog.


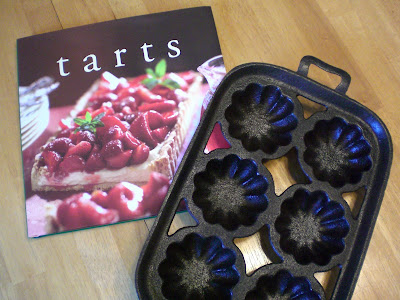
I bought a cast iron pan, which my grandmother says is for making corn muffins. I plan to make some mini tarts in it though after also purchasing this tart cookbook. There are some great recipes I plan to try out soon!


I also purchased some Watkin’s Double Strength Vanilla flavoring. This is the next best thing to using actual vanilla beans in my book. My mom bought me the plate because we thought it would be cute displayed in my kitchen.


So there you have it; my trove of treasures. All the walking did me in Saturday and I am still recovering. Therefore the meal plan for last night went out the window. I was just too tired to cook, so we just made do with whatever we found in the fridge. I am going to try to stick to the plan for the rest of the week though. Tune in to see if my good intentions come to fruition.

Friday, April 25, 2008

TGIF...literally!

I am so so so glad it is finally Friday! This week has been dragging by for me thanks to my TV shows coming out with new episodes and my insane need to stay up late to watch them. Yes, I now consider 10:00 p.m. late. It's a pregnancy thing, just go with it. ;) Therefore, I have been exhausted during the day at work, which only makes the week seem to take that much longer. It's not like I have a relaxing weekend planned though. My weekend is packed pretty full again, so no new recipes are planned until next week. I am going to Nashville to a huge flea market tomorrow, so if I find anything interesting and/or exciting, I will post about that this weekend instead.

Anyway, since it is Friday here is my meal plan for next week (not everything will be blogworthy...LOL):

Monday: Pasta a la Carbonara

Tuesday: Risotto

Wednesday: Grilled Pork Chops with Roasted Corn (I'm also making Strawberry Cupcakes for the Ladies meeting I have Thursday night)

Thursday: Burgers & Fries

Friday: Leftovers

Wednesday, April 23, 2008

Chicken Parmesan

I don’t really have anything interesting to say about our dinner in this post. It was really good. We both enjoyed it. Wow…I just re-read that and realized how lame it sounds. I think I am just too tired and too full to complete decent sentences right now. I have been eating a ridiculous amount of food lately. I just feel hungry all the time. And then after I eat, I feel exhausted and ready to lay down for a nap. I guess my little man is growing big and strong in there. I am dreading reading the scale at my next doctor’s appointment though. Anyway, here’s the recipe for the Chicken Parmesan we had tonight. It was really good. We both enjoyed it. Wait, I think I’ve said that already. ;) The only complaint I have is that the crust never got good and brown for me and it stuck to the foil even though I sprayed it with cooking spray. I had to turn ont he broiler to get any color at all. I think next time I will just pan fry the chicken breasts. Who really cares about eating healthy anyway?

Chicken Parmesan
Source: adapted from Brittany at Adding a Little Southern Charm

2 boneless, skinless chicken breasts, pounded thin - I marinated mine overnight in a romano basil vinaigrette
1 1/2 cups bread crumbs
2 tbsp Italian herb blend
1 tbsp garlic powder
1/4 cup parmesan cheese, grated
1/4 cup marinara sauce, divided
1/4 cup mozzarella cheese, divided

Preheat oven to 400. Line a baking sheet with foil and spray well with cooking spray. Mix bread crumbs, Italian herb blend, garlic powder and parmesan cheese together in a dish large enough to fit the chicken. Take chicken out of marinade and shake to remove any excess. Dip into bread crumb mixture, again shaking to get rid of any excess. Place on baking sheet. Cook 15 minutes, then turn over. Continue to cook until chicken is done and add a small bit of marinara sauce and top with cheese. Put back in oven for a few minutes until cheese is melted.


We served ours with angel hair pasta, mine with alfredo sauce and Taylor’s with marinara.

Tuesday, April 22, 2008

Kickin' it up a notch!


I like Emeril, really I do. But usually I get bored watching his show because he doesn't often make things the average home cook can whip up on a week night. Also, his recipes usually have WAY too many ingredients for me. However, I was looking for a different pork chop recipe since they were on sale this weekend. I really like pork chops, but have yet to find a good solid go-to recipe.

I came across Emeril's Shake 'Em Up Pork Chops and knew it would be on my table this week. It does have a ton of ingredients, but you can sub some of them for things you are more likely to have on hand. Let me also say that I googled appropriate substitutions for masa harina and there really don't seem to be any. The closest thing seems to be corn meal, but no one really suggests using it since they are prepared differently. However, since it is just part of the coating of the chops here, I decided to make an executive decision and substitute it anyway.

This is a pretty time consuming recipe when you include the marinating time. I meant to put the chops in the marinade last night and they would just get an extra long soaking, but I was too tired after dinner and gave in to my body's need to lay down. So tonight I had to make the marinade and let the chops sit. I managed to wait the 2 hours (with a snack of course) but it was hard. I have to say it was worth it though. Man, those were some good pork chops!! This will definitely be my go-to recipe when frying chops. Taylor's comment? "These are the best pork chops I've ever had. They were even moist when I heated them up the next day as leftovers!"

To go with our chops we had sautéed potatoes with garlic and shallots. It is a take off of Dela's Leeky Potatoes. I had never sautéed the potatoes without parboiling them first. This way would have been way less time consuming except I didn't follow Dela's directions to keep the potatoes in a single layer in the pan. I had too many for a single layer and just threw them all in there. It was taking too long, so I ended up finishing them off in the oven. They tasted great though!!

Emeril's Shake 'Em Up Pork Chops
Source: Emeril Lagasse

1/2 cup dry white wine - I used chicken stock
1/4 cup plus 1/3 cup olive oil
2 teaspoons liquid concentrate crab and shrimp boil (recommended: Zatarain's)
1/2 teaspoon ground black pepper
1/2 teaspoon cayenne pepper
3 cloves garlic, smashed
1 bay leaf
4 bone-in center-cut pork loin chops, about 12 ounces each
1 cup dry bread crumbs
1/2 cup masa harina - I used corn meal
1 1/2 cups finely grated Parmesan
1 tablespoon Essence, recipe follows
1/3 cup olive oil


Emeril's ESSENCE Creole Seasoning (also referred to as Bayou Blast):
2 1/2 tablespoons paprika
2 tablespoons salt
2 tablespoons garlic powder
1 tablespoon black pepper
1 tablespoon onion powder
1 tablespoon cayenne pepper
1 tablespoon dried oregano
1 tablespoon dried thyme

Combine all ingredients thoroughly.

Yield: 2/3 cup

In a large resealable plastic bag, combine the wine, 1/4 cup of the oil, the crab boil, pepper, cayenne, garlic, and bay leaf. Add the pork chops and marinate, refrigerated, turning occasionally, for 2 to 4 hours.

In a clean, large plastic bag, combine the bread crumbs, masa harina, Parmesan, and Essence. Shake to mix.
Remove the pork chops from the marinade and shake to remove any excess. One at a time, add the chops to the dry mixture and shake until evenly coated. Remove, place on a large plate, and refrigerate for 15 minutes.

In a large skillet or saute pan, heat the remaining 1/3 cup of oil over medium-high heat. Add the chops and cook until golden brown and cooked through, 5 to 6 minutes per side.


Sautéed Potatoes with Garlic and Shallots
Source: Adapted from Dela’s Leeky Potatoes

3 large red potatoes
1 shallot, minced
1 teaspoon rosemary
2 cloves of garlic, minced
1/4 teaspoon red pepper flakes
2 tablespoons butter
2 tablespoon olive oil
salt and pepper


Heat the butter and oil in a large skillet. Stir in the red pepper flakes and the rosemary and heat for at least 5 minutes to infuse the oil. After about 3 minutes add the garlic and shallots. Wash your potatoes and cut a small piece off each end. Then cut them in half long ways and slice them into half moons. Make sure all your slices are about the same size so they will cook evenly. Crank the heat up to about medium and let the pan get a little smoky. Arrange the potatoes in a single layer and cook, tossing and stirring every few minutes until they are browned and fork tender.

Monday, April 21, 2008

20 minutes 'till heaven


Ever since I made homemade pizza several weeks ago, it keeps coming back up when we talk about what to have for dinner. It is really simple (thanks to the no yeast pizza dough recipe I use) and I love that you can cater to your tastes for the night. I saw a yummy looking white pizza on A Taste of Home Cooking last week and was inspired to create my own.

I actually thought ahead this time and prepared my dough Sunday night and stuck it in the fridge. This was a brilliant idea! I need to start thinking ahead more often. ;)

For my version of the white pizza I knew I wanted to use cream cheese as a base. I also still have gouda in the fridge (I know you are shocked to see me using it again). I mixed that with some freshly grated parmesan cheese and mozzarella for the topping and that makes a total 4 cheeses on my pizza. Do I hear angels singing? All that cheese must mean I’m in heaven, right?


Jaime’s Heavenly White Pizza
(This pizza makes 8 small slices)


1/2 recipe for no yeast pizza dough
4 oz. Cream cheese, softened
1 large clove garlic, pressed
1/4 tsp. Cayenne pepper
1/4 tsp. Salt
1/2 cup each smoked gouda, mozzarella and parmesan, shredded/grated
1/3 cup chopped cilantro
Red pepper flakes, to taste


Combine cream cheese, garlic, cayenne pepper and salt together in a mixing bowl. Roll out your pizza dough and top with cream cheese mixture. Follow with the gouda, mozzarella and parmesan cheeses. Finally, top with cilantro and red pepper flakes. Bake according to dough directions. Mine bakes for about 20 minutes, hence the title. ;)

Saturday, April 19, 2008

Blogging with a Purpose


Nicole at Art and Aioli bestowed upon me the Blogging with a Purpose award. This is my first blog award and I couldn't be more flattered! It is slightly crazy to me that anyone even reads the thoughts and recipes I put out into cyberspace, much less actually enjoys it. Don't worry, I'm not getting a big head though. ;) Thanks Nicole for giving me this award!

Now I get to pass on this award on to 5 others.

  • The Home Cook at A Taste of Home Cooking: I just realized when I was tagging her for this award that I don’t know her actual name. All her posts are as “The Home Cook.” Anyway, I love reading her blog! Her food is all about cooking for her family and friends and she uses ingredients I usually have around my house. That in and of itself is blogging for a purpose in my book!
  • Leslie at Definitely Not Martha: Her tagline says it all. “The daily struggles of the domestic un-goddess.” Her food looks pretty domestic goddess-like to me though! She is hilarious and I love to check in and see when she has a new post. Leslie has great recipes and her posts are always entertaining to read. Each post is like a story and she uses a lot of step by step pictures with her recipes.
  • Jaime at Good Eats ‘N Sweet Treats: I just recently discovered Jaime’s blog and I have really enjoyed reading her past entries. I’ve already used some her suggestions in making Chicken Tikka Masala and I can’t wait to try out more of her recipes. She loves to bake and since that is an area where I am severely lacking I am taking notes!

  • Emiline at Visions of Sugar Plum: First and foremost I am impressed with the fact that Emiline writes her own recipes. Whereas I throw some things together and call it a dish, she actually writes REAL recipes…like baked goods…where you have to have accurate measurements. I am totally in awe of this skill! Her pictures are equally impressive and always make me hungry, even if it’s something my picky self wouldn’t normally eat. ;)

  • Celeste at Sugar & Spice: Celeste is another Alabama girl! Her blog is full of great recipes. She is straight forward and to the point. Her posts are less about stories and background and more about the food. She makes a point to make sure you have all the details about the dishes she has made. Her pictures are also awesome!!!

Award-winners, here's what you should do:
1. nominate 5 blogs which haven't had this award before
2. each of the blogs must have a purpose
3.the nominated blogs must make a link back to this page
4. the logo from the award must be put on their blog and it must link back to this blog!

Garden in a Bag - Update #2


Grow, grow, grow! The cilantro and Italian parsley have really taken off, but the basil is lagging a little behind. This is week 4 since they've been planted and the bag says about 7-10 weeks before I will have anything to harvest. So, a little bit longer to wait.

Friday, April 18, 2008

Putting It Out There

So, I'm going to take a step out and publish my meal plan for next week. It is a little scary for me because I don't want you to all think I'm a big loser if I don't follow through. This cooking every night or almost every night thing is starting to take its toll on me. It's not really the cooking part. It's the part where I come straight home from work and go right into the kitchen and begin cooking. Then sit down 45 minutes to an hour later and eat. At that point I am just exhausted. But I am so thankful to have a wonderful husband who will handle the clean up so I can go to bed early. This way I can enjoy my love of cooking and side step my loathing of cleaning up. ;)

My meal plan is only for the weeknights at the moment because we are so busy on the weekends right now. Saturday and Sunday, we end up just grabbing whatever we can find. So, here is what is in store for next week:

Meal Plan
4/21 - 4/25

Monday: Pizza - I am going to try my hand at making a white pizza this time. I'm sure Taylor will have his traditional pepperoni and cheese.

Tuesday: Emeril's Shake 'Em Up Pork Chops and Sauteed Potatoes with Garlic and Shallots

Wednesday: Chicken Parmesan with Angel Hair Pasta

Thursday: I have a women's group meeting at church, so Taylor will be on his own.

Friday: Leftovers from the week

So, only 3 nights of cooking instead of 4 like the previous 2 weeks. I just need a little break. :)

Thursday, April 17, 2008

I'm One Tired Turkey

I’m tired. Just plain tired. (Obviously not too tired to think of a cheesy title though) I was super busy last weekend and will be going pretty much non-stop all the way into next weekend. I’m not complaining. All the running around has been something I enjoy. It’s just that this 7 month pregnant body doesn’t function quite the way it used to. And don’t even get me started on the sleeping situation. All that to say, I was so tired I almost threw the meal plan for tonight out the window. After making breakfast for dinner last night I asked Taylor if he would mind just having leftovers or whatever we could scrounge together for tonight. He was so sweet and of course said he didn’t mind.

Well, I changed my mind when I realized I was leaving work early today to deal with some car stuff and I would have more time at home before dinner than I originally thought. The meal plan tonight called for grilling the wild turkey breast we had in the freezer. Yes, my husband is a killer. He enjoys hunting just about anything, but his favorite is turkey. That being said, he has only ever had it prepared one way: fried…as in breaded and submerged in oil. I am not a big fan of fried food in general and since this would be my first time to eat wild turkey he said I could prepare it however I wanted. I think he is hoping that if I really like it I will encourage him to go on more hunting trips. After all, it is turkey season in Alabama right now. ;)

I decided to marinate and grill the turkey breast. I had a little surprise when I went to add the meat to the marinade. It was not a whole breast, but had been pre-cut into pieces and chunks for frying. And then had another surprise when I found out our grill was out of gas. So, I just marinaded the chunks and grilled it in my grill pan. The marinade turned out nice and spicy. But I think it would have been even better had I been able to marinade the whole breast and grilled it outside.

The turkey was served with oven roasted corn with cilantro lime butter and twice baked potatoes. Ever since we had them last week Taylor has asked for a repeat, so they made their way back to the dinner table tonight.

Wild Turkey Breast Marinade
Source: Me

1/2 tsp Brown Sugar

2 Garlic Cloves, pressed

1 tbsp Lime Juice

2 tbsp Soy Sauce

2 tsp Cayenne Pepper

1 tsp Basil, I used dried since mine hasn’t grown enough yet.

1 1/2 tbsp Apple Cider Vinegar

1-2 drops Liquid Smoke - I will say to use this sparingly. It is potent!

1 1/2 tbsp Olive Oil

Reserve about 1/4 cup of the marinade to brush on meat as you are grilling. Add the rest to a Ziploc bag with the Turkey Breast and let it hang out for about 2 hours in the fridge.

Heat grill to 375 degrees. Grill until internal temperature is 170 degrees.


Oven Roasted Corn with Cilantro-Lime Butter
Source: Me

3 ears corn
2 tbsp butter, softened
1/4 cup chopped cilantro
1/2 tbsp lime juice
1/2 tbsp garlic powder
1 tbsp grated parmesan cheese

Heat the oven to 350 degrees and place corn in husks directly on the rack for 30-40 minutes.

Mix butter, cilantro, garlic powder, lime juice and parmesan cheese in a small bowl. Once the corn comes out of the oven, peel away the husks and brush with butter. Or if you are like me and prefer not to get corn stuck in your teeth, you can cut the corn off the cob into a medium bowl and toss with the cilantro-lime butter.

Sorry for the bad picture, I told you I was tired.

Wednesday, April 16, 2008

Breakfast for Dinner!

I love breakfast food! We don’t have it that often because on the weekdays we are both running off to work and more often than not, on the weekends we just have cereal. We are boring, I know. Therefore, breakfast for dinner works much better for us. I added it to the meal plan for this week because I wanted something easy and something comforting. Pancakes are my most favorite breakfast food, especially with strawberry syrup. No, not maple. I hate maple syrup. Taylor smothered his pancakes in that overly sweet concoction though. The more the better as far as he is concerned.

I looked for a new pancake recipe because I’ve always made them with Bisquick (other than one time in 9th grade Home-Economics when we made them from scratch). Tonight the pancakes were made from scratch and oh were they yummy! Perfect and fluffy, and because I was cooking them they didn’t get overly brown. I am strange when it comes to breads of any kind. I do not like brown and crunchy. I know, I’m weird.

We also had bacon, scrambled eggs and hash browns. Here’s another weird thing about me. I cook my bacon in the microwave because it isn’t as greasy that way. I like crisp, non-greasy bacon. I have this cool plate you microwave the bacon on and it makes clean up so easy! The hash browns were just something I threw together.

This is what I call comfort food!

Pancakes
Source: allrecipes.com, my additions/changes in italics

1 cup all-purpose flour
1 tbsp white sugar
1 tsp baking powder
1/2 tsp baking soda
1/4 tsp salt
1 cup milk
1 egg
2 tbsp vegetable oil
1/8 tsp vanilla extract


Preheat a lightly oiled griddle over medium-high heat. Combine flour, sugar, baking powder, baking soda and salt. Make a well in the center. In a separate bowl, beat together egg, milk, vanilla and oil. Pour milk mixture into flour mixture. Beat until smooth.

Pour or scoop the batter onto the hot griddle, using approximately 1/4 cup for each pancake. Brown on both sides and serve hot.

Tuesday, April 15, 2008

Wow, now that's what I call SPICY!

After my purchase of garam masala last week, Kate said I HAD to make Chicken Tikka Masala. Of course I had never heard of it, so I was on a quest to find out what this new chicken dish was all about. Turns out it is a very well known Indian dish. But seeing how I’ve never really been exposed to much Indian food, it was not well known to me. I’m not even sure if we have a good Indian restaurant in Central Alabama. Was it even something I would like?


I searched Kate’s blog because I knew if she was recommending it, it must be on there somewhere. It took me a few minutes since she has 50, yes 50, chicken recipes posted. I finally found it and it looked great! I decided to look around at other recipes also because hers called for a few things I didn’t have on hand. Let me tell you, a lot of food bloggers have made this dish and everyone seems to love it. I was convinced and set out to make my own.


I found what looked like a fairly easy recipe on allrecipes.com (but it didn’t actually call for garam masala and that is why I was making this dish!) and then found out that Jaime at Good Eats ‘N Sweet Treats had used the same recipe but added the garam masala to the chicken and the sauce. We also spell our name the same way so I was pretty sure she would be right on this too. ;)


I also discovered that most people serve theirs with Naan, an Indian flat bread. I looked at recipes and even chose one, but at the last minute decided I just wasn't up for that much work on a weeknight. So, I had garlic crescent rolls with mine and they were delicious!


I wish I had thought to make the marinade last night and let the chicken sit in it until tonight, but that much forethought just doesn't happen these days. I did let it sit for the recommended hour, but I think it would have been even better over night. I've never had the "real thing" before, but if it tastes anything like how mine turned out, I really like Indian food! The flavors were unlike anything I've ever had before. It was spicy, but the spice didn't overpower the dish. It was the perfect amount of spiciness for me. :)


Chicken Tikka Masala
Original Source: allrecipes.com-my changes/additions in italics

1 cup yogurt
1 tablespoon lemon juice
2 teaspoons ground cumin
1 teaspoon ground cinnamon
2 teaspoons cayenne pepper
2 teaspoons freshly ground black pepper
1 tablespoon minced fresh ginger
4 teaspoons salt, or to taste - I only used 1 teaspoon…who uses that much salt??
1 teaspoon garam masala
3 boneless skinless chicken breasts, cut into bite-size pieces - I just grilled the breasts whole and cut them up later


1 tablespoon butter
1 clove garlic, minced
1 jalapeno pepper, finely chopped
2 teaspoons ground cumin
2 teaspoons garam masala
2 teaspoons paprika
3 teaspoons salt, or to taste (again, just 1 teaspoon)
1 (8 ounce) can tomato sauce
1 cup heavy cream
1/4 cup chopped fresh cilantro


In a large bowl, combine yogurt, lemon juice, cumin, cinnamon, cayenne, black pepper, ginger, garam masala and salt. Stir in chicken, cover, and refrigerate for 1 hour. Preheat a grill for high heat. Lightly oil the grill grate. Thread chicken onto skewers, and discard marinade. Grill until juices run clear, about 5 minutes on each side.


Melt butter in a large heavy skillet over medium heat. Saute garlic and jalapeno for 1 minute. Season with cumin, paprika, garam masala and salt. Stir in tomato sauce and cream. Simmer on low heat until sauce thickens, about 20 minutes. Add grilled chicken, and simmer for 10 minutes. Transfer to a serving platter, and garnish with fresh cilantro. I served the chicken and sauce over jasmine rice.

Monday, April 14, 2008

The Meal Plan Continues

Ok, let me just say I am loving having a weekly meal plan!. I managed to get all the dishes I aspired to cook last week on the table. And they were all new recipes! I made a meal plan for this week also, so we'll see how it goes. I believe they are also all new recipes, so it will be another heavy blogging week. :)

I am still trying to use up the meat that is over-crowding our freezer, so first up is Rib-eye Steaks with Mustard Parmesan Crust. It was ok. Not my favorite steak. Taylor and I both agreed the mustard didn't add anything to the dish. It actually overpowered it a little. He thought it would have been really good if I had omitted the mustard.

The steaks were served with Seasoned Grill Fries. These turned out pretty good. But then again, I don't often meet a potato I don't like.


Rib-eye Steaks with Mustard Parmesan Crust
Source: Food Network

Mustard Parmesan Coating:

20 cloves garlic, peeled
1/2 cup olive oil
3 tablespoons fresh, roughly chopped thyme
3 tablespoons Dijon mustard

3 thick rib-eye steaks (about 2 to 2 1/2-inches)
Grey salt and fresh ground black pepper
Olive oil, for drizzling
2 cups fresh, finely grated parmesan cheese

In a pre-heated saute pan over medium-low heat, pan roast the garlic in olive oil, tossing only once. Allow to brown for about 5 to 10 minutes. Drain the cloves through a strainer. Allow to cool before mashing roughly with fork. Add thyme to garlic paste and mash that in as well. When they are pasty but still chunky, mix in the Dijon mustard.


Preheat oven to 450 degrees F. Preheat a grill to high.


Season steaks well with salt and pepper. Pound the seasonings in well. Drizzle steaks on both
sides with olive oil. Place meat on grill to brown, about 5 minutes each side. I used my grill pan since we had a cold snap and I didn't want to go outside.

Remove steaks from grill, place on a large cookie tray. Cover top
generously with mustard parmesan coating. Top with large piles of parmesan, spreading out to edges carefully with fingers. Place steaks in oven for 8 or 9 minutes.


Seasoned Grill Fries
Source: Bobby Flay , adapted by me

3 red potatoes, washed
1 tbsp olive oil
1 tbsp chili powder
1/2 tbsp sea salt
1/2 tsp ground cumin
1 tbsp garlic powder

Cover the potatoes with cold water in a large saucepan and cook until almost tender. Drain and dry the potatoes. Cut each potato lengthwise into quarters. Place the potatoes in a medium/large mixing bowl and toss with oil. Mix chili powder, salt, cumin, and garlic powder together in a small dish. Roll potatoes in the spice mixture, one at a time, and place on a plate to take to the grill. Again, I used the grill pan. Grill the potato wedges for 3 to 4 minutes per side until golden brown.

A Little About Me


I was tagged by Kate for a meme. Following are 6 words that describe me, at this moment. :)

Independent

Lover of Mt. Dew

Creative

Smiling

High Maintenance

Mommy-to-be

I have tagged others whose blogs I read regularly:

DeLa
Elizabeth
Amy
Mary Ellen
Nicole

Here are the rules:
1. Write your own six-word memoir.
2. Post it on your blog and include a visual illustration if you’d like.
3. Link to the person who tagged you in your post.
4. Tag five or six (choice is yours) more blogs with links.
5. Remember to leave a comment on the tagged blogs with an invitation to play.

Friday, April 11, 2008

On top of Spaghetti...


Are gouda stuffed meatballs!! YUM! Well, they were on top of my spaghetti. This is yet another dish where Taylor and I differ on the best way to serve it. He prefers meat sauce instead of meatballs. I of course prefer meatballs. So tonight, we each had it our way.

I found a recipe for mozzarella stuffed meatballs in Rachel Ray's magazine and they looked so good. I didn't have any mozzarella, so I used gouda. (I know I've been using it a lot lately, but there is a big hunk of it in my fridge and I need to use it up. Plus, I just LOVE it!)

Gouda Stuffed Meatballs
Source: Adapted from Rachel Ray's Mozzarella Stuffed Meatballs

1/4 cup plain breadcrumbs
1/2 cup milk (or water)
1 lb. lean ground sirloin
1 clove garlic, chopped
1/2 cup parmesan cheese, plus more for serving
2 tbsp flat leaf parsley, chopped
1 large egg
1 tsp salt
4 ounces gouda, cut into about 20 (1/2 inch) cubes

In a medium bowl, soak the breadcrumbs in milk. Add the beef, chopped garlic, parsley, parmesan cheese, egg and salt to the soaked bread crumbs and stir with a fork until combined. Place about 2 tablespoons of the mixture in your hand and press a gouda cube into the center. Shape the meat around the cheese, forming a ball. Repeat with the remaining meat and gouda.

Submerge meatballs in whatever sauce you are using. Bring sauce to a simmer and let cook for 20 minutes without stirring.

Thursday, April 10, 2008

Where's the Beef?


We've had a lot of beef lately, on our table and therefore, on the blog. Tonight was a chicken night. I've missed it and was glad to see it re-emerge. I've had a recipe I saw on Amber's Delectable Delights saved for a while, foil packet chicken. I'm not sure why I haven't made it before now, but I'm glad I stumbled across the recipe again. Taylor has now deemed this his favorite meal. He kept oohing and aahing over the flavor of the chicken. He said he was prepared to not really like the potatoes, but they ended up being well seasoned also. I'm guessing this will be showing up on our table more regularly now. Works for me since clean up is a breeze!

Corn was on sale at the grocery store, so I picked up a few ears and they too made their way onto our plates tonight. I love grilled corn! And since all the cooking took place outside on the grill our house didn't get so hot. The corn ended up being my favorite part of the meal.

Foil Packet Chicken
Source: Originally from Amber's Delectable Delights, adapted by me

2 boneless skinless thin chicken breast cutlets
1 tsp Italian seasoning
1/2 tsp garlic powder
Salt, pepper and parmesan cheese to taste
2 medium sized red potatoes
1/4 cup marinara sauce
1/4 cup mozzarella cheese

Preheat Grill to 400 degrees.
Lay 2 pieces of aluminum foil on a flat surface and spray the middle of each with non-stick cooking stray. Wash and scrub potatoes and slice into very thin slices (I used my mandolin). Arrange the potatoes in an oval shape onto the middle of the foil about the size of your piece of chicken and sprinkle them with salt, black pepper and parmesan cheese to taste. Mix garlic and Italian seasoning in a small bowl and sprinkle on both sides of the chicken, along with a little salt and pepper, and place a chicken breast on top of each pile of potatoes. Top each chicken breast with 1/8 cup of marinara sauce and 1/8 cup of cheese. Raise up the long sides of foil and fold down twice, do the same thing to the sides of the foil creating an air tight seal.

**Be careful not to let the top of the foil packet touch the top of the chicken or your sauce and cheese will be stuck to the top. This happened to me, so I just added more cheese after I opened it and let it melt. Next time I will be more careful.**


Transfer packets to the grill. Grill for about 30 minutes. Remove packets from grill and allow to sit a few minutes before poking holes in the packets with a fork to release some of the steam before opening. Make sure juices from the chicken run clear. If you are using thin chicken breasts this should not be a problem.

Grilled Corn
Source: Adapted from The Food Network

3 ears corn

1/2 tbsp cayenne pepper
1/2 stick butter - this actually made a little much. You could probably use 1/4 stick.

1 tbsp dried basil or oregano
1 tbsp garlic powder

By peeling back husk, but not detaching, remove silk from corn. In small skillet melt butter and add cayenne, basil and garlic. Brush onto exposed kernels. Cover kernels with husk. Place corn on electric, gas or charcoal grill. Grill for 12 - 15 minutes, rotating every 2 - 3 minutes.


This corn is awesome, but preparing is slightly messy. Especially after it comes off the grill and the outer husks are charred. I ended up with black corn husks all over my kitchen floor from when I was cutting the corn off the cob and onto the plates. Nothing the dust buster couldn't take care of and it was so worth it!


Wednesday, April 9, 2008

Not Your Average Burger and Fries


So far, the meal plan is working out great! It is so much easier to know what I am making for dinner when I get home. No extra thinking required, which really helps with this pregnancy brain thing I have going on. Tonight the menu called for Asian Style Hamburgers and Oven Fries. My friend Melissa came over to show me her engagement ring (which is gorgeous by the way) and she and Taylor both seemed to enjoy dinner. Both their plates were clean!

I am really not a big hamburger fan. I have to be in the mood for them, which is why I developed this recipe a few years ago. It basically all comes down to the fact that I like my meat to be flavor infused. As my grandmother would say, I don't like anything to just taste like God created it. I always have to add a little something. In this case, I added lots of little somethings.

As you should know by now, most recipes I come up with do not have exact measurements. I guess at how much I put in, but you should always play around with the amounts depending on how much seasoning YOU like. I can be a little heavy handed.

Asian Style Hamburgers
Source: Me

1/2 lb. lean ground beef
1 shallot, minced
2 cloves garlic, minced
2 tbsp soy sauce
1 tbsp toasted sesame oil
1 tbsp celery salt
1 tbsp crushed red pepper flakes
1 tbsp ginger powder

Mix all of the above in a medium sized bowl and sit to the side to let the flavors really work themselves through the meat. In the meantime, start working on your potatoes.

Oven Fries (also Asian style)
Source: Me, adapted from Rachel Ray

6 medium sized red potatoes, washed
1 1/2 tbsp celery salt
1 1/2 tbsp garlic powder
1/2 tbsp cayenne pepper
1 tbsp ginger powder
toasted sesame oil, for drizzling

Preheat the oven to 425 degrees. Cut the potatoes into wedges and place on a baking sheet. Drizzle with sesame oil. Sprinkle with all the spices and toss with your hands. You want each wedge to have plenty of oil and spice, so you may need to drizzle a little more oil and sprinkle more spices on the top after the first toss. I did, but I like my potatoes really well seasoned. Also, the spices will create a nice crust on the potatoes. Bake for 25 minutes or until fork tender.

Once the potatoes are in the oven, pre-heat your grill and start making the hamburger patties.

The fries should be done just about the time you come back inside from grilling the burgers. I topped my burger with a few slices of gouda and some chili sauce, and had some ranch dressing to dip my fries in. The burger would have been great with some cilantro on top, but I didn't have any. :(

Tuesday, April 8, 2008

Corn Casserole

Luncheons at work are always a nice change of pace. You don't have to think about what to pack and you are usually guaranteed at least a few items of good home cooking. Our office decided to have 2 days this week because our underwriter provided us with 2 hams and a turkey. We decided to bring casseroles and sides one day and the next day we would just have sandwiches of the leftovers. I signed up to bring corn casserole. Mostly because it is one of the only casseroles I will eat and I wanted to make sure I had something other than meat for lunch.


I chose the recipe by Paula Deen because I figured who would know how to make a good southern corn casserole better than Paula Deen? This was one of the easiest recipes I've ever made and I will definitely be making it again. It took no time to prepare other than the 45 minutes it spent in the oven. I think this will become my go to dish for family get-togethers.

Corn Casserole
Source: Paula Deen

1 (15 1/4-ounce) can whole kernel corn, drained
1 (14 3/4-ounce) can cream-style corn
1 (8-ounce) package corn muffin mix (recommended: Jiffy)
1 cup sour cream
1/2 cup (1 stick) butter, melted
1 to 1 1/2 cups shredded Cheddar

Preheat oven to 350 degrees F.

In a large bowl, stir together the 2 cans of corn, corn muffin mix, sour cream, and melted butter. Pour into a greased 9 by 13-inch casserole dish. Bake for 45 minutes, or until golden brown. Remove from oven and top with Cheddar. Return to oven for 5 to 10 minutes, or until cheese is melted. Let stand for at least 5 minutes and then serve warm.

My First Week with a Meal Plan

Let me begin by saying I have great things planned for this week...food-wise anyway. I might even be a little overly ambitious. I have four meals planned for this week, plus a casserole I have to make for a luncheon at work. I am not going to post my meal plan because I don't want you to be too disappointed if it doesn't all come together. Taylor was very impressed when he saw it on the fridge though. Not because the dishes themselves are impressive, but because I am cooking 4 days this week, or plan to anyway. For some of you this might be routine, but I usually only cook 2, 3 at the most, times per week. The other nights we have leftovers or whatever you can find in the pantry.

My first dish of the week is Spicy Thai Shrimp. I saw this recipe on Kate's blog, Paved with Good Intentions, recently and knew I would be making it soon. I have some frozen shrimp I've been trying to finish off and I am always looking for new ways to cook them. Of course it would be best with fresh shrimp, but frozen is what I had on hand. The shrimp were very good and I loved the flavor broiling them added. They weren't too spicy for me, but I LOVE spicy food. Taylor said they were plenty spicy to him. So begins the week of cooking with a meal plan. :)


Spicy Thai Shrimp

Source: Paved with Good Intentions

1/4 cup lime juice
1/4 cup minced shallot
3 Tbsp sesame oil
2 cloves garlic, minced
2 Tbsp minced ginger
2 tsp garam masala
1 tsp salt
1/2 tsp ground coriander
1/2 tsp crushed red-pepper flakes
1/2 tsp black pepper
1 lb shrimp, peeled and deveined

1) In medium bowl, combine juice, shallot, oil, garlic, ginger, garam masala, salt, coriander, red pepper flakes and pepper.
2) Add shrimp and marinade for 30 minutes.
3) Heat broiler and spray broiler pan with cooking spray. Remove shrimp from marinade. Broil shrimp 2 minutes, turning once.


Now, if you are like me and kind of new to cooking, you may be asking yourself: "what in the world is garam masala?" Yeah, I had to go to wikipedia to find out. So here you go:

Garam masala is a blend of ground spices common in the Indian, Bangali and Pakistani cuisine, whose literal meaning is 'hot (or warm) spice'. There are many variants: most traditional mixes use just cinnamon, roasted cumin, caraway seeds, cloves, nutmeg (and/or mace) and green cardamom seed or black cardamom pods. Many commercial mixtures may include more of other less expensive spices and may contain dried red chili peppers, dried garlic, ginger powder, sesame, mustard seeds, turmeric, coriander, bay leaves, star anise and fennel. While commercial garam masala preparations can be bought ready ground, it does not keep well, and soon loses its aroma. Whole spices, which keep fresh much longer, can be ground when needed using a mortar and pestle or electric coffee grinder.

I found mine on the spice aisle at Publix!

We also had twice-baked potatoes to go with our shrimp. I realize those things don't necessarily go together, but it was a really good dinner!


Twice-Baked Potatoes
Source: Me

Potatoes - any kind of your choosing. I used large new potatoes because that's what I had. Idaho potatoes work really well and are larger.
Sour Cream
Milk
Bacon - cooked and crumbled
Cheese - shredded. Again, use the kind you like!

The amounts of the above ingredients depend on how many potatoes you are making. I used 3 potatoes so we would have some leftovers. :) Wash the potatoes and use a fork to poke a few holes in them. Pop them in the microwave for about 2-3 minutes per potato, depending on the size. Let them cool a bit on the counter because they will be piping hot! Once cool enough to handle, cut
them in half lengthwise. Use a spoon to scoop out the flesh and place that in a large mixing bowl. You want to leave a little flesh on the sides so the potato will keep it's shape. Each half should resemble a boat.

Once they have all been scooped out, add milk, sour cream and bacon to the bowl of potato flesh and mix to combine. I didn't have that many potatoes so I did this by hand, but if you have a lot I would suggest using a hand mixer to combine the potatoes, milk and sour cream. Then add in the bacon. It should be the consistency of mashed potatoes. Fill up the potato skin boats with the mixture and top with cheese. Put under the broiler, on high, for about 5 minutes or until cheese is melted.


Sunday, April 6, 2008

I Love Strawberries!

I am so glad it is spring and strawberries are back in the store! Yep, strawberries are my favorite fruit and one of my favorite foods in general. I will eat just about anything strawberry. Over the years I have asked my grandmother to make strawberry cobbler instead of apple or peach, but she and my mom always try to talk me out of it. They says I won't like it, that the strawberries just won't be as good warm and it will go to waste. Well, I decided to give it a try myself. I decided to use the same cobbler recipe as my Southern Apple Cobbler, but with strawberries of course, and I sprinkled white granulated sugar on top instead of brown sugar.
It was good. This picture doesn't really do it justice. I will say that I like apple cobbler better though. I ate one serving warm, right out of the oven. It would have been really good with some whipped cream but I didn't have any. I also had a serving later after it had been in the fridge for a while. It was pretty good cold too. A nice Sunday evening dessert. :)

Cupcakes, Take 2


Ok, so I've said before I am not an avid baker. I love to eat baked goods, but I always mess them up when I try to make them. Especially desserts. Right after Taylor and I got married I tried to make chocolate cupcakes to take to dinner with some friends. They have kids and I thought this would be a fun dessert to bring. Let me start off with the fact that I began this venture after I got home from work one night. Not a good idea. I need to be fresh and of sound mind when I decide to bake. I even tried to make it easier on myself by using a boxed cake mix. So, the cupcakes themselves turned out fine. It was the icing that gave me trouble. First off, I didn't have a real recipe. I just called my mom and asked how she makes her icing. It is my favorite. She told me and I thought I followed her directions. Obviously not. My icing was way too thin and just ran all over the cupcakes. By the end of the night I swore off baking since I couldn't even make stupid cupcakes.

Many months later I have decided to try again. My husband requested chocolate cupcakes Saturday, so I went on a hunt for a recipe I could make from scratch (yep I was trying a little harder this time) and an icing recipe I hopefully could follow. I came across a chocolate peanut butter cupcake recipe that was very similar to an easy chocolate cupcake recipe I found, so I merged the two.

The batter was really thick, but my results were much better this time. The cupcakes were moist and had just the right hint of peanut butter. Taylor was pleased. I also played with my pastry bag and tips I've had forever but never used. I don't think I did too bad for the first time.

Chocolate Peanut Butter Cupcakes
Adapted from allrecipes.com

1 1/3 cups all-purpose flour
1/4 teaspoon baking soda
2 teaspoons baking powder
3/4 cup unsweetened cocoa powder
1/8 teaspoon salt
1/3 cup shortening
1/3 cup peanut butter
1 1/2 cups white sugar
2 eggs
3/4 teaspoon vanilla extract
1 cup milk

  1. Preheat oven to 350 degrees F (175 degrees C). Line a muffin pan with paper or foil liners. Sift together the flour, baking powder, baking soda, cocoa and salt. Set aside.
  2. In a large bowl, cream together the shortening, peanut butter and sugar until light and fluffy. Add the eggs one at a time, beating well with each addition, then stir in the vanilla. Add the flour mixture alternately with the milk; beat well. Fill the muffin cups 3/4 full.
  3. Bake for 15 to 17 minutes in the preheated oven, or until a toothpick inserted into the cake comes out clean. Frost with your favorite frosting when cool.

Buttercream Icing
Source: Wilton

1/2 cup solid vegetable shortening
1/2 cup butter or margarine, softened
1 teaspoon clear vanilla extract - I just used regular vanilla extract
4 cups sifted confectioners' sugar (approx. 1 lb.)
2 tablespoons milk

In large bowl, cream shortening and butter with electric mixer. Add vanilla. Gradually add sugar, one cup at a time, beating well on medium speed. Scrape sides and bottom of bowl often. When all sugar has been mixed in, icing will appear dry. Add milk and beat at medium speed until light and fluffy. Keep bowl covered with a damp cloth until ready to use. For best results, keep icing bowl in refrigerator when not in use. Refrigerated in an airtight container, this icing can be stored 2 weeks. Rewhip before using.

YIELD: Makes about 3 cups.

Saturday, April 5, 2008

Garden in a Bag - Update #1

We have growth!! The basil and cilantro have sprouted and the parsley looks like it really wants to, so maybe in the next day or so. I've now removed the plastic, per the instructions, and placed them in the window sill in my kitchen. Let's hope the growing continues!

Wednesday, April 2, 2008

Mystery Meat

Remember in an earlier post when I made pot roast? And I mentioned that my in-laws had given us the roast and I had thrown it in the freezer? Well, this is another piece of meat from the in-laws that was freezer-bound. The problem is, I have no idea what cut of meat it is. It is definitely beef and it is rather large and has been sealed in a food saver bag. Taylor says it is just a really big ribeye steak, but I prefer to call it "mystery meat." It is just more fun that way. ;)

I do want to add that I am very thankful for the freezer full of meat my in-laws have provided. They love to buy in bulk, and my father-in-law can not pass up a good deal, so we reap the benefits. Our freezer was starting to overflow though because most of it was given to us a few months ago when I was still incredibly sick from this pregnancy. Back then I stayed as far away from the kitchen as humanly possible. Therefore I am now cleaning out the freezer and working these meats into our dinners. My husband is thrilled since he is a raging carnivore. For him, a meal is not a meal without meat.

Tonight the mystery meat came out. I put it in a marinade I whipped up when I got home, so it only got about a 45 minute soak. (I usually prefer 4-5 hours or overnight, but not time for that tonight.) Then onto the grill it went. I had the leftover Rosemary Leek Mashed Potatoes as my side and Taylor had green bean casserole. (See I do feed my husband veggies even if I refuse to touch them)


My Marinade
(I don't usually measure when I make my own marinades. Just go with what feels right.)


worcestershire sauce
minced garlic
dijon mustard
chili paste
olive oil
seasoned rice vinegar

Tuesday, April 1, 2008

Platinum Chef!


This is my first entry into the Platinum Chef Challenge. Actually, this is my first time to participate in any food blogging event and I have to say that I had a blast! I really enjoyed thinking outside my usual "food box."

Platinum Chef is a spin off of Iron Chef (on the Food Network - If you've never heard of it you must live under a rock), but with 5 secret ingredients instead of 1. Go here to see this month's challenge, chosen by Kate over at Paved with Good Intentions.

This challenge got me to try an ingredient I had never eaten, much less cooked with before, capers. I will say that I did not dislike the taste, but I don't see them becoming a normal fixture on my grocery shopping list. I do however have some left in the jar, so I will be searching for more recipes in which to use them.

The 5 ingredients that had to be utilized in your recipe(s) were:
  • capers
  • leeks
  • cream (heavy cream, light cream, cream freche or cream cheese - your choice)
  • rosemary
  • lemon

This was a pretty daunting task for me since I only cook regularly with one of the ingredients - cream cheese. It's not that I dislike the others, they just don't normally show up on my dinner table. I decided to choose basic meal items that were very familiar to me, steak and potatoes, as a building block. (Another factor in choosing this meal was that I had both those items on hand and since we are on a budget these days this would decrease the amount of ingredients I had to pick up at the store.) So here is my very first entry into the Platinum Chef Challenge and the world of blogging events:

Caper Basil Ribeye Steaks with Rosemary Leek Mashed Potatoes

The steak is marinated in a caper-basil vinaigrette that I found on The Food Network's website from Bobby Flay.

Caper-Basil Vinaigrette
Source: Bobby Flay, my additions in italics

6 tablespoons red wine vinegar
2 teaspoons Dijon mustard
2 cloves garlic, finely chopped
1/2 teaspoon salt
1/2 teaspoon freshly ground black pepper
1/2 cup olive oil
4 tablespoons capers, drained and coarsely chopped
4 tablespoons chopped fresh basil leaves, or 4 teaspoons dried basil
Juice of half a lemon


Whisk together the vinegar, mustard, lemon juice, garlic, salt, and pepper in a medium bowl. Slowly whisk in the oil until emulsified. Stir in the capers and basil.

Reserve some marinade to drizzle over meat after it is cooked. Place individual ribeye’s into a freezer bag with the rest of the marinade for at least 4 hours. **This amount of time worked out perfectly.

Grill until desired done-ness (we like our steak medium). Top with some of the reserved marinade.


Rosemary Leek Mashed Potatoes
Source: Me

5 potatoes, peeled and cubed - the smaller you cube them the quicker they will cook
1 tsp dried rosemary or 1 tbsp fresh chopped rosemary - I used dried since I had it on hand
1 tbsp olive oil
1 small leek, white part only, sliced thin
1 large clove garlic
8 oz. cream cheese, cubed

2 tbsp milk

salt, to taste
a dash of cayenne pepper - if you like a little kick

Cook potatoes in boiling water until fork tender. Drain and set to the side.

In a medium sauce pan combine oil, garlic and leeks, sautéing until tender and fragrant. Add the rosemary and cook another minute or two. Place contents in a food processor and pulse until it forms a paste.

Add potatoes and milk to a large bowl and mash. I chose to use my hand mixer to make this job a little easier. Once combined, add cream cheese a few cubes at a time continuing to mix. Then add the garlic/rosemary/leek paste to the potatoes as well as salt and cayenne pepper. Mix to combine.

**This made a LOT of potatoes. We loved them though so we've been incorporating them into other meals. This recipe could easily serve 4.
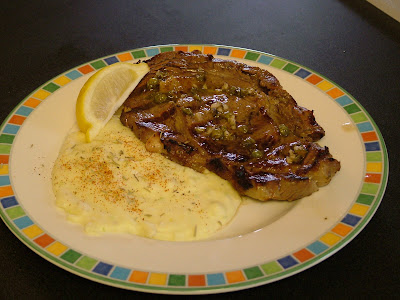


This meal turned out even better than I expected! I was a little unsure how the marinade would work out, but this was the best steak I've ever cooked! The steak was tender and had a great flavor through out. We will definitely be using it again. Taylor really enjoyed the entire meal, but his favorite was the potatoes. He even went back for seconds which is saying a lot. I think we were both a little surprised at how much we liked this dinner since there were several ingredients we weren't used to eating.

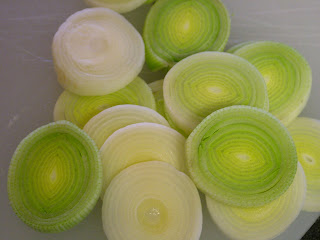
And this is just a cool picture of the sliced leeks my husband took. (He also took the picture of the meal above)